
Challenges in shutter fitting: the homeowner’s guide

Challenges in shutter fitting
TL;DR:
- Proper measurement and wall assessment are essential to prevent fitting issues like gaps, warping, or sagging in shutters. Using accurate, multiple measurements and accounting for structural irregularities ensures shutters fit well and function correctly. Material choice and correct hardware installation further extend the longevity and performance of fitted shutters.
Challenges in shutter fitting arise primarily from inaccurate measurements, uneven window frames, and unsuitable hardware. These are not minor inconveniences. A poorly fitted shutter sags, gaps, sticks, or warps within months, undoing both the aesthetic and practical value of the investment. Whether you are fitting plantation shutters, café style panels, or solid tier-on-tier designs, the same core problems appear repeatedly. This guide identifies each challenge clearly, explains why it happens, and gives you the practical knowledge to prevent or fix it without starting from scratch.
What are the main challenges in shutter fitting?
Shutter fitting challenges fall into four categories: measurement errors, structural irregularities, hardware mistakes, and material failures. Most DIY installations run into at least one of these. The good news is that all four are preventable with the right approach before a single screw touches the wall.
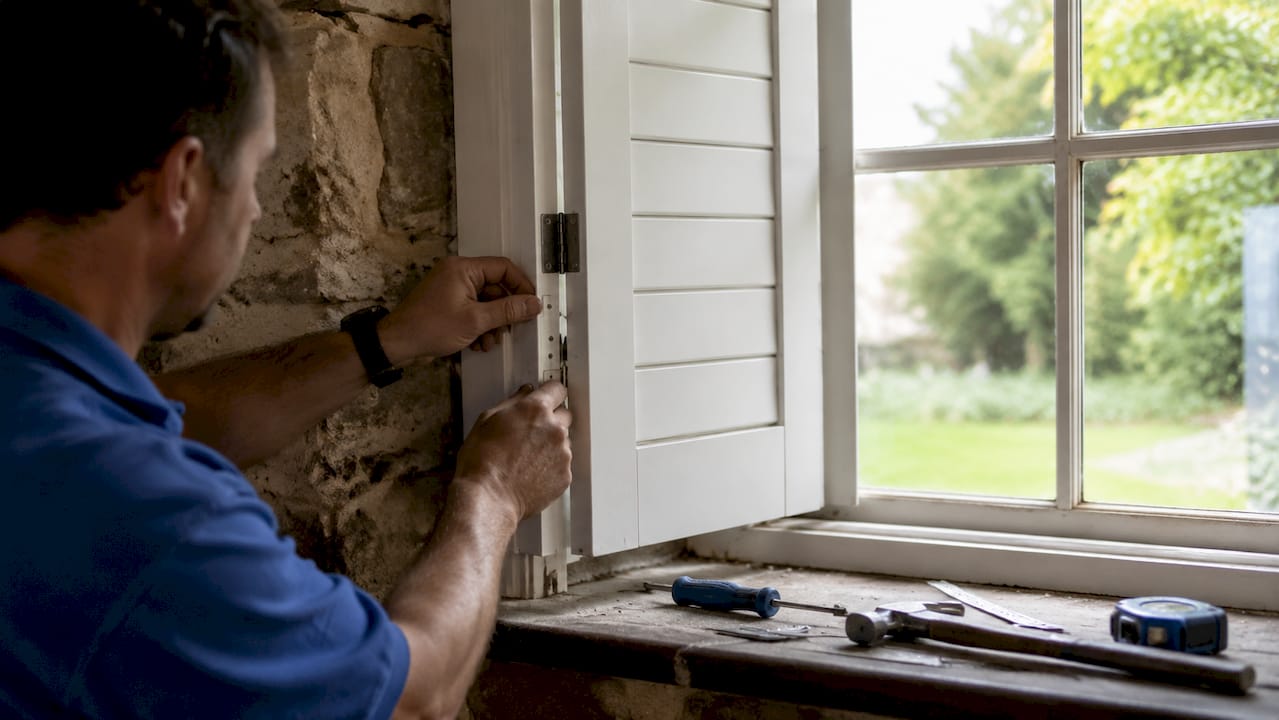
The misleading appearance of perfectly square shutters in showrooms causes many homeowners to underestimate how irregular their own windows actually are. A shutter that looks flawless on a display stand will expose every millimetre of imperfection in a real home. That gap between expectation and reality is where most shutter fitting mistakes begin.
Proper shutter installation involves accounting for wall irregularities, not just the window opening itself. Professional tools and techniques become indispensable when walls lean, reveals twist, or frames bow. Recognising this upfront saves significant time, money, and frustration.
How do measurement errors cause fitting problems?
Measurement errors are the single most common cause of shutter fitting problems. A shutter ordered even 5mm too wide or too narrow will not sit correctly inside a reveal, and returning bespoke shutters for remakes is costly and time-consuming.
Industry standard practice is to measure window width and height in three locations: top, middle, and bottom. This detects discrepancies of just a few millimetres that indicate an out-of-square frame. Taking a single measurement from the centre is the most common DIY mistake, and it produces a figure that represents none of the three actual fitting points.
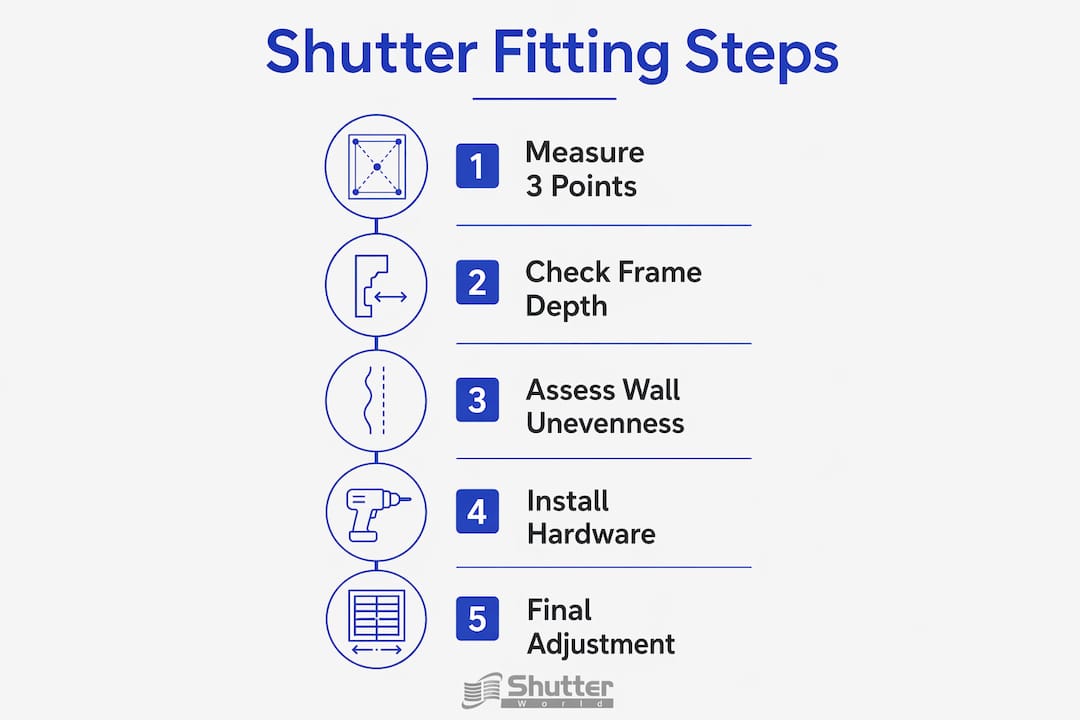
Beyond width and height, diagonal measurements reveal whether a window is truly square. Measure corner to corner in both directions. If the two figures differ by more than 3mm, the frame is out of square and your shutter panels will need to be ordered or trimmed accordingly. The Shutterworld step-by-step measuring guide covers this process in full detail for both inside and outside mount installations.
Common measurement mistakes to avoid:
- Measuring only once at the centre of the window
- Forgetting to account for the depth of the window reveal
- Ignoring existing window furniture such as handles or locks that reduce usable space
- Failing to check whether the floor or sill is level before measuring height
- Ordering without checking the minimum reveal depth required for the chosen shutter style
Pro Tip: Measure the frame depth before ordering. Most inside-mount shutters require a minimum reveal depth of 63mm to 90mm depending on the panel thickness. Ordering without this check is one of the most expensive shutter fitting mistakes a homeowner can make.
Why do uneven frames and walls cause shutter problems?
Uneven window frames and walls are a structural reality in the vast majority of UK homes, particularly in properties built before 1980. Older homes often have out-of-plumb reveals, meaning the sides of the window recess lean inward, outward, or twist along their length. Fitting a rigid shutter panel into a twisted reveal without adjustment produces visible gaps, crooked panels, and shutters that will not close properly.
The choice between inside mount and outside mount installation matters here. An inside mount sits within the window recess and relies entirely on the reveal being consistent. An outside mount fixes to the wall or surrounding frame, giving you more flexibility to compensate for an uneven opening. For windows with significant irregularities, outside mount is often the more forgiving option.
When inside mount is the preferred choice, these adjustments restore a clean result:
- Check the reveal for plumb using a spirit level on all four sides before fitting anything.
- Use timber or composite shims behind the frame to bring the fixing points into alignment.
- Add custom trim or architrave to cover any remaining gap between the shutter frame and the wall.
- Use Z-clips or adjustable brackets where the wall surface prevents a flush fixing.
- Recheck plumb and level after each panel is hung, not just after the frame is fixed.
For windows with unusual shapes, the Shutterworld guide on measuring irregular windows provides specific techniques for arched, angled, and bay window configurations.
Pro Tip: Run a long spirit level diagonally across the reveal before ordering. A twist of more than 4mm across the diagonal means your shutter frame will need packing at the corners. Catching this before the shutters arrive prevents a frustrating refit on installation day.
What hardware and installation errors damage shutter performance?
Hardware errors are responsible for a large proportion of shutter failures that appear weeks or months after installation. The damage is often invisible at first, which makes it harder to diagnose.
Over-tightening screws during installation strips paint, compresses the frame material, and restricts the natural expansion of wood or MDF. Over time, this causes warping and uneven operation. The fix is to use a torque-controlled screwdriver and stop at the point of firm resistance, not maximum force.
Hinge placement is equally critical. Hinges positioned too close to the centre of a panel allow the top and bottom to droop under the panel’s own weight. The correct position is approximately 7 inches from the top and bottom of each panel. Undersized hinges compound this problem. Heavy-duty stainless steel non-mortise hinges are the correct choice for full-height plantation shutters.
Using inappropriate fixings for the wall substrate is another frequent error. Timber walls accept wood screws directly. Brick and concrete require masonry anchors. Plasterboard alone cannot support the weight of a full shutter frame without cavity fixings or a timber batten behind. Ignoring substrate differences leads to fixings that loosen under load, causing the entire frame to shift.
Key hardware rules for a lasting installation:
- Always drill pilot holes before driving screws into timber or MDF frames
- Match fixing type to substrate: masonry anchors for brick, cavity fixings for plasterboard
- Use stainless steel hardware in bathrooms and kitchens where moisture is present
- Never use self-tapping screws in pre-finished shutter frames without a pilot hole
- Check that all hinges are rated for the panel weight before purchasing
Pro Tip: If you are fitting shutters to a plastered brick wall, tap the surface first. A hollow sound indicates a thick plaster skim that will not hold a masonry anchor reliably. Fix a timber batten to the brick behind the plaster and screw the shutter frame to the batten instead.
How do you troubleshoot common shutter fitting mistakes on-site?
Diagnosing a fitting problem calmly before reaching for tools is the most important step. Rushing to trim or adjust without understanding the root cause creates secondary problems that are harder to fix.
| Problem | Likely cause | Correction |
|---|---|---|
| Visible gap on one side | Out-of-square frame or uneven reveal | Add filler strip or repack frame with shims |
| Panel sags when open | Hinge too small or placed incorrectly | Replace with heavy-duty hinge at correct position |
| Panel sticks when closing | Frame too wide or reveal narrows at one point | Trim frame edge carefully; check reveal width at three points |
| Louvres do not align | Tilt rod misaligned or panel twisted | Adjust tilt rod connector; check panel for twist |
| Frame pulls away from wall | Wrong fixing for substrate | Remove, fit correct anchor, and refix |
Slightly oversized shutters can often be trimmed carefully on the frame edges. PVC and polypropylene-coated shutters must be trimmed with a fine-tooth saw to avoid cracking. Hardwood shutters accept a plane or router for minor adjustments. Shutters that are too narrow present a different problem. Adding a filler strip to the reveal reduces the opening width to match the shutter, which is a cleaner solution than returning the order.
Signs that a fitting problem needs professional attention rather than DIY correction:
- The frame has twisted along its length rather than sitting flat
- Multiple panels are misaligned despite correct hinge placement
- The wall substrate has failed and will not hold any fixing securely
- The window reveal is so far out of plumb that shimming alone cannot compensate
The Shutterworld resource on shutter installation risks outlines the point at which DIY correction becomes counterproductive and professional assessment adds real value.
How do materials and environment affect shutter fit over time?
A shutter that fits perfectly on installation day can develop problems over the following months if material and environmental factors are not considered during selection. Wood movement is the primary culprit. Solid timber shutters expand in humid conditions and contract in dry heat. In a poorly ventilated bathroom or a conservatory with large temperature swings, an untreated or poorly finished timber shutter can warp noticeably within a single season.
Fixed-louvre shutters installed upside-down trap moisture between the louvre and the frame, accelerating paint failure and warping. The louvre angle should always direct water outward and downward. Poor surface preparation before painting compounds this. A shutter with bare timber exposed at cut edges will absorb moisture unevenly, causing localised swelling that distorts the panel shape.
Material choices that reduce long-term fitting problems:
- MDF with an extruded polypropylene coating, such as Shutterworld’s Seattle range, resists moisture and temperature change better than untreated timber
- Premium hardwood shutters, such as the Montana range, perform well when properly sealed and finished on all six faces of every component
- Aluminium shutters are the most stable choice for high-humidity rooms and conservatories
- Avoid solid timber shutters in rooms where relative humidity fluctuates by more than 20% seasonally
Maintenance also preserves fit. Wipe shutter frames and louvres with a dry or lightly damp cloth rather than saturating them with water. Check hinge screws annually and tighten any that have worked loose. A well-maintained shutter holds its fit for decades.
Key takeaways
Measurement accuracy, structural preparation, correct hardware, and material selection together determine whether a shutter installation succeeds or fails from day one.
| Point | Details |
|---|---|
| Measure in three locations | Take width and height readings at top, middle, and bottom to detect out-of-square frames. |
| Check reveal depth before ordering | Most inside-mount shutters need a minimum reveal depth; confirm this before placing any order. |
| Match fixings to the substrate | Use masonry anchors for brick, cavity fixings for plasterboard, and timber screws for wood frames. |
| Place hinges at the correct position | Fix hinges approximately 7 inches from top and bottom to prevent panel sag over time. |
| Choose materials suited to the room | Polypropylene-coated MDF or aluminium outperforms untreated timber in humid or high-variation environments. |
What I have learned from years of shutter fitting
The mistake I see most often is not the one people expect. Homeowners worry about choosing the wrong style or colour. The real problem is almost always the first measurement. I have watched beautifully crafted shutters arrive on site and fail to fit because someone measured once, from the centre, with a tape that was not held taut. That single error cascades into a day of frustration and, sometimes, a costly remake.
The second lesson took me longer to accept: the wall is seldom straight. I used to assume that a modern home would have plumb reveals and square frames. It rarely does. The moment I started treating every window as potentially irregular and checking with a spirit level before touching anything else, my installations became dramatically more consistent.
A well-installed shutter can increase a home’s kerb appeal and save a meaningful amount compared to full professional installation costs. That payoff is real, but it only materialises when the preparation is thorough. The homeowners who get the best results are not necessarily the most experienced. They are the ones who slow down, check twice, and resist the urge to force a panel that does not quite fit.
If you are taking on a DIY shutter installation, use a laser level rather than a spirit level alone. Invest in the right fixings for your wall type before you start. And if the reveal is badly out of plumb, consider outside mount rather than fighting the structure. The shutter itself is the easy part. The preparation is where the result is decided.
— Ken
Shutterworld’s bespoke fitting solutions for every home
Fitting shutters well starts with shutters that are made to the exact dimensions of your windows. Off-the-shelf sizes force compromises that bespoke manufacturing eliminates entirely.

Shutterworld designs and installs plantation shutters across the UK, with every panel made to measure from a professional in-home survey. The service covers standard rectangular windows and complex shapes, including bay windows, arched frames, and angled roof lights. Each installation is carried out by experienced fitters who account for uneven reveals, structural irregularities, and substrate differences as standard. If you want shutters that fit from day one and hold their fit for years, speak to the Shutterworld team about a free survey and quotation.
FAQ
What is the most common shutter fitting mistake?
The most common mistake is taking a single measurement from the centre of the window rather than measuring width and height at three points. This misses out-of-square frames and produces an inaccurate order.
Can I trim shutters that are slightly too wide?
Slightly oversized shutters can be trimmed carefully on the frame edges. PVC and polypropylene-coated shutters require a fine-tooth saw to avoid cracking; hardwood shutters accept a plane for minor adjustments.
How do I fix a sagging shutter panel?
Sagging usually results from hinges placed too close to the panel centre or undersized hinges. Reposition hinges to approximately 7 inches from the top and bottom of the panel and replace with heavy-duty stainless steel non-mortise hinges.
Why does my shutter have a gap on one side after fitting?
A one-sided gap indicates an out-of-square frame or an uneven reveal. Add a filler strip to the narrower side of the reveal or repack the shutter frame with shims to bring it into alignment.
Do wood shutters change size after installation?
Yes. Solid timber shutters expand in humid conditions and contract in dry heat. Choosing MDF with a polypropylene coating or aluminium shutters for high-humidity rooms prevents this movement and preserves the original fit.