
How to create shutter specifications: a homeowner’s guide

TL;DR:
- Accurate shutter specifications are vital for a perfect fit, controlling light, and seamless operation, requiring precise measurements and detailed hardware choices. Proper preparation involves measuring at three points per dimension, checking for obstructions, and selecting appropriate materials, louvre sizes, and mounting styles, especially for complex windows. Clear, comprehensive documents with sketches, photos, and specifications prevent costly errors and ensure the manufacturer can deliver exactly as envisioned.
Shutter specifications are the complete written record of every measurement, material choice, hardware detail, and design requirement needed to produce custom window shutters that fit and function perfectly. Getting these specifications right is the single most important step between a beautiful idea and a flawless installation. A missing millimetre, an unspecified tilt rod, or a vague material description can mean costly remakes and delays. This guide walks you through the full process of creating shutter specs, from preparing your tools to drafting a document your manufacturer can work from with confidence.
How to create shutter specifications: what you need to know first
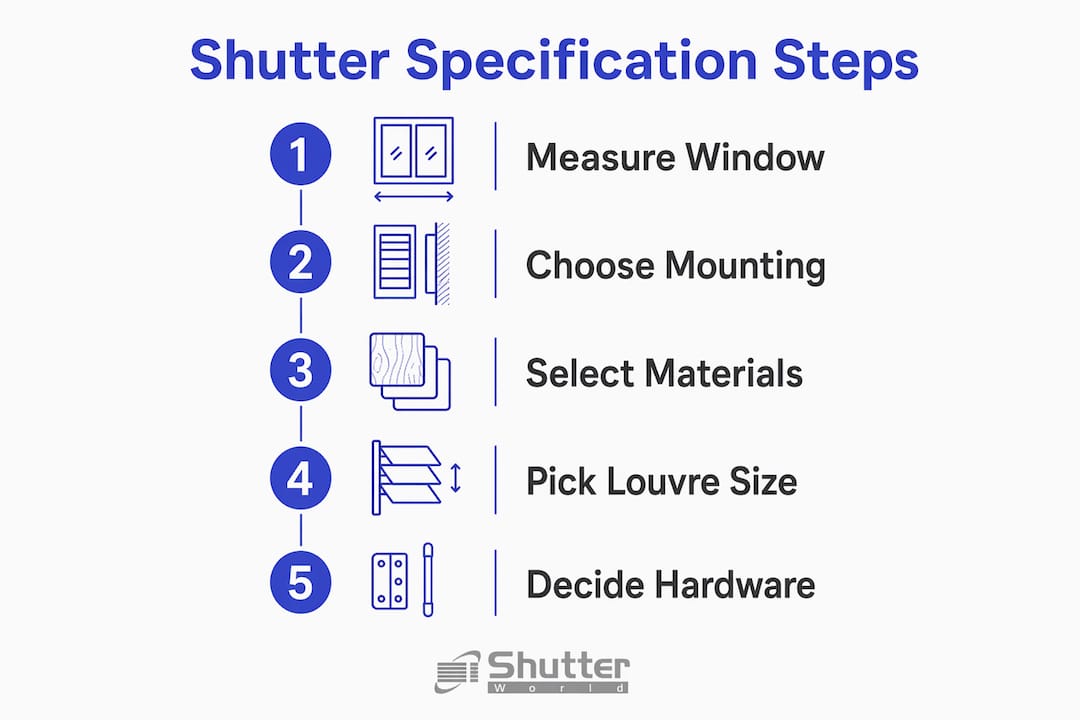
Shutter specifications, known in the trade as a shutter schedule or shutter brief, cover four core categories: dimensions, materials, hardware, and mounting method. Every decision in one category affects the others. Choose a 4.5-inch louvre, for example, and you immediately need to account for greater stack depth and additional clearance around door handles. Choose solid hardwood over MDF and your hinge count and panel width limits change. Understanding these interdependencies before you pick up a tape measure is what separates a specification that works from one that causes problems on installation day.
The outcome of precise shutter design requirements is not just a good fit. Well-specified shutters control light exactly as intended, operate smoothly for years, and integrate with your interior architecture rather than fighting it. Shutterworld’s bespoke shutter designs are built entirely from client-supplied or surveyor-verified specifications, which is why the finished result consistently matches the original vision.
What tools and preparations are needed before measuring for shutters?
Preparation determines accuracy. Before you take a single measurement, gather the following:
- A steel measuring tape (not fabric, which stretches and distorts readings)
- A spirit level to check whether your window frame is plumb and level
- A pencil and squared paper, or a tablet with a notes app
- A stepladder for tall windows
- An assistant to hold the tape steady and record figures
Beyond tools, your first decision is mounting style. An inside mount sits within the window recess and gives a clean, architectural look. An inside mount shutter needs a minimum recess depth of 2.75 inches to accommodate shutter thickness and allow the louvres to rotate without striking the glass. An outside mount overlaps the surrounding trim and suits shallower recesses or windows where you want to create the illusion of greater width.
Inspect the window frame before measuring. Look for handles, locks, restrictors, or radiators that sit within the swing path of the shutter panels. Note any protrusions on a rough sketch. These obstacles will directly influence your panel width, louvre size, and hardware choices later.
Pro Tip: Take photographs of each window from directly in front and from both sides before you start measuring. These images become invaluable when you are drafting the specification document and need to communicate frame quirks or obstructions to your manufacturer.
How to take precise window measurements for shutter specifications
Accurate measurement is the technical foundation of every successful shutter project. Measuring at three points for both width and height is the industry-standard method, and it exists because almost no window frame is perfectly square.
Follow these steps in order:
- Measure the width at the top, middle, and bottom of the recess. Record all three figures, then use the smallest as your working width. This prevents the shutter from binding against a narrower section of the frame.
- Measure the height at the left, centre, and right of the recess. Again, record all three and use the smallest.
- Measure the recess depth from the front face of the frame to the glass. Compare this against your chosen shutter thickness and louvre rotation arc.
- Check squareness by measuring both diagonals of the opening. If the two diagonal measurements differ by more than 5 mm, the frame is out of square and your specification must note this so the manufacturer can compensate.
- Record all clearances around handles, hinges, and any trim that protrudes into the opening.
The table below summarises the key measurements to record for a standard inside-mount specification:
| Measurement | Where to take it | What to record |
|---|---|---|
| Width | Top, middle, bottom | Smallest of the three |
| Height | Left, centre, right | Smallest of the three |
| Recess depth | Front face to glass | Single measurement |
| Diagonal A to B | Corner to corner | Both diagonals |
| Obstacle clearance | Handle, lock, restrictor | Distance from frame edge |
Pro Tip: Re-measure every window on a separate day before submitting your specification. Double-checking measurements is the single most effective way to prevent ordering errors, particularly for the smallest recorded width and height.
How to select materials, louvre sizes, and hardware for shutter specifications
Material choice defines the character and longevity of your shutters. The three most common options each have distinct properties:
- MDF with a polypropylene coating (such as Shutterworld’s Seattle range) resists moisture and is dimensionally stable. Painted MDF shutters are typically specified at 18 to 20 mm thickness, which suits most standard hardware tolerances.
- Solid hardwood (such as Shutterworld’s Montana range) offers a premium finish and greater structural integrity. Solid wood shutters are specified at 20 to 22 mm thickness to manage natural expansion and ensure hardware fits correctly.
- Aluminium suits wet rooms and conservatories where timber would warp. It is lighter per panel but requires specific hinge types rated for the material.
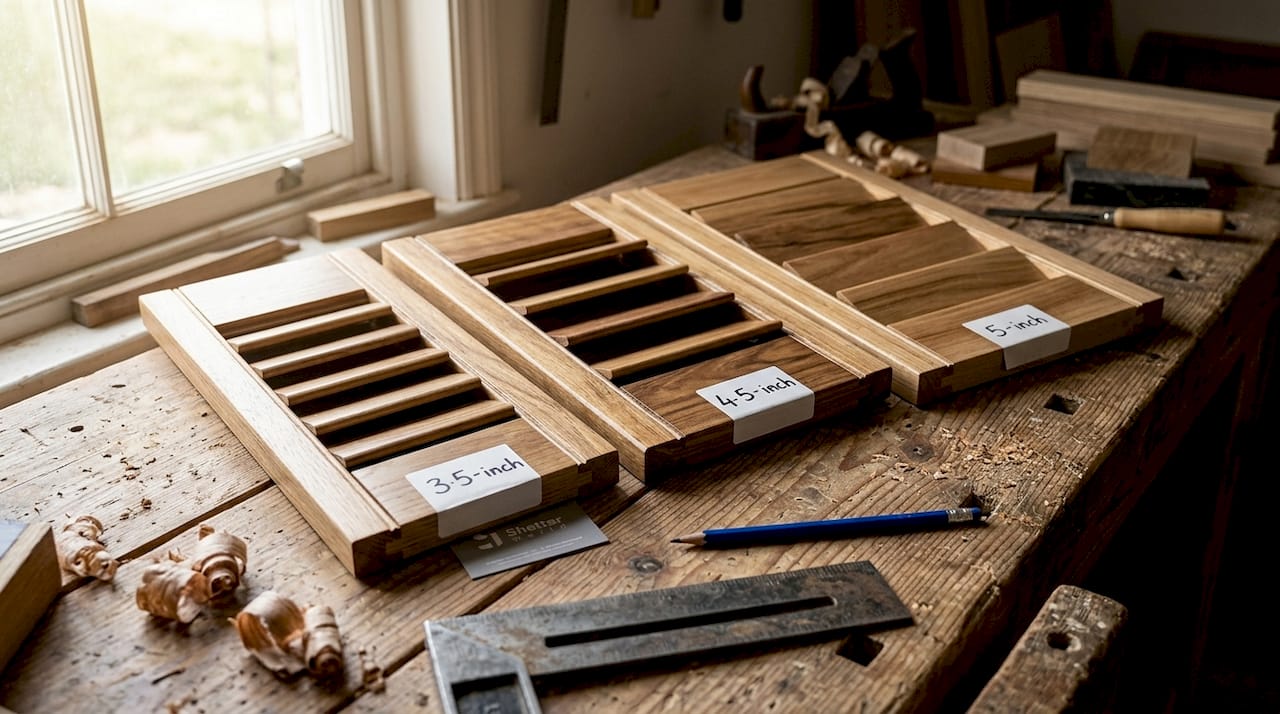
Louvre size is one of the most consequential decisions in your specification. The 3.5-inch louvre is widely regarded as the golden ratio for most interior windows, balancing light control with an unobstructed view when open. A 4.5-inch louvre maximises the view through the glass but demands more clearance for the rotation arc, which becomes a problem near door handles or tight recesses. A 2.5-inch louvre suits smaller, cottage-style windows but can feel visually heavy on larger openings.
Hardware selection completes the specification. The choice between a centre tilt rod and a hidden clearview tilt rod affects both the shutter’s appearance and its interaction with door furniture. A hidden tilt rod creates a cleaner profile and prevents the rod from snagging on handles, which is particularly important on French doors. For hinge count, panels taller than 900 mm require a third hinge positioned near the centre to prevent the panel from twisting under its own weight. Panel width should not exceed 450 to 500 mm for the same reason: beyond this, the weight distribution stresses the hinges and makes the shutter harder to operate.
You can explore how shutter finishes affect performance in more detail if you are weighing up material and coating options for a specific room.
How to draft clear, detailed shutter specification documents
A specification document is only useful if someone who has never seen your windows can read it and manufacture the correct product. Clarity and completeness are non-negotiable. Your document should include:
- Dimensioned sketches for each window, labelled with width, height, recess depth, and diagonal measurements
- Material type and thickness, including the specific product range where known
- Louvre size and count, with the calculated spacing between louvres noted
- Mounting style (inside or outside mount) with clearance requirements stated explicitly
- Hardware specification, including tilt rod type, hinge count, hinge material, and any locking mechanisms
- Finish and colour, referenced against the manufacturer’s colour chart or RAL code
- Photographs of each window, particularly for bay windows, arched openings, or frames with unusual obstructions
For complex or non-standard windows, custom arched shutters require precise templates or CAD drawings in addition to written measurements. A hand-drawn template cut from card and sent to the manufacturer is often more reliable than a written radius measurement alone. Shutterworld’s guide to shutters for arched windows explains this process in full for homeowners dealing with non-rectangular openings.
Pro Tip: Before sending your specification to a manufacturer, ask a second person to read it and attempt to describe the window from the document alone. If they cannot, the specification needs more detail.
What are common mistakes when creating shutter specifications?
Even careful homeowners make predictable errors. Knowing them in advance saves time, money, and frustration.
- Ignoring obstructions in the swing path. A door handle, window restrictor, or radiator that sits within the arc of a rotating louvre will cause the shutter to bind or scratch. Map every obstacle before finalising louvre size and panel width.
- Using the largest measurement instead of the smallest. Recording the widest point of an uneven frame and ordering to that dimension means the shutter will not fit into the narrower section. Always use the smallest recorded figure.
- Skipping the squareness check. A frame that is 8 mm out of square across the diagonal will cause a rectangular shutter panel to sit visibly crooked. Note the diagonal difference in your specification so the manufacturer can produce a parallelogram-shaped frame if needed.
- Underspecifying hardware. Listing “hinges” without specifying count, material, or load rating leaves the manufacturer guessing. A solid hardwood panel at maximum width needs a specific hinge count and gauge to operate correctly.
- Omitting panel thickness from the specification. Shutter panel thickness is not a cosmetic detail. It determines whether the hardware fits, how the louvres rotate, and whether the shutter clears the window frame when open.
“The most common specification error we see is a homeowner measuring only once and at only one point. A window that looks perfectly rectangular rarely is. Three measurements per dimension, and always the smallest, is the rule that prevents the majority of fitting problems.” — Shutterworld installation team
For windows that fall outside standard rectangular shapes, professional consultation is not a luxury. It is the practical choice. Shutterworld’s surveyors handle bay windows, angled frames, and arched openings as standard, producing verified specifications that remove the risk of a costly misfit.
Key takeaways
Precise shutter specifications require accurate three-point measurements, correctly matched materials and louvre sizes, fully detailed hardware choices, and a clearly documented brief that leaves nothing open to interpretation.
| Point | Details |
|---|---|
| Measure at three points | Record width and height at top, middle, bottom and left, centre, right; always use the smallest figure. |
| Check squareness | Compare both diagonals; a difference greater than 5 mm must be noted in the specification. |
| Match louvre size to clearance | A 3.5-inch louvre suits most windows; 4.5-inch requires additional swing clearance around handles. |
| Specify panel thickness | MDF shutters run 18 to 20 mm; solid wood 20 to 22 mm; thickness affects hardware fit and operation. |
| Document everything | Include dimensioned sketches, photographs, material codes, hardware counts, and finish references. |
Why precision in shutter specifications matters more than most homeowners realise
Having worked with hundreds of bespoke shutter projects over the years, the pattern I see most often is this: homeowners invest considerable thought in choosing the right style and material, then treat the measurement and specification stage as a formality. It is not. The specification is where the design either succeeds or fails before a single piece of timber is cut.
The windows that teach you the most are the awkward ones. Arched openings, deep Victorian sills, bay windows with compound angles. For these, CAD-assisted design is genuinely useful for producing accurate templates, but it is the artisanal hand-finishing at the manufacturing stage that determines whether the louvres move smoothly and the frame seals tightly. Technology and craft work together here; neither replaces the other.
What I find homeowners consistently underestimate is the tilt rod decision. It feels like a minor detail, but a centre tilt rod on a French door with period-style handles is a functional problem waiting to happen. The hidden tilt rod is almost always the right choice for doors, and it looks considerably better. If your specification does not specify tilt rod placement, the manufacturer will make a default choice that may not suit your space.
My honest advice: if your windows are standard rectangles in good condition, a careful homeowner with a steel tape and this guide can produce a workable specification. If anything about your windows is unusual, bring in a professional surveyor. The cost of a survey is a fraction of the cost of a remake.
— Ken
Let Shutterworld take the specification work off your hands
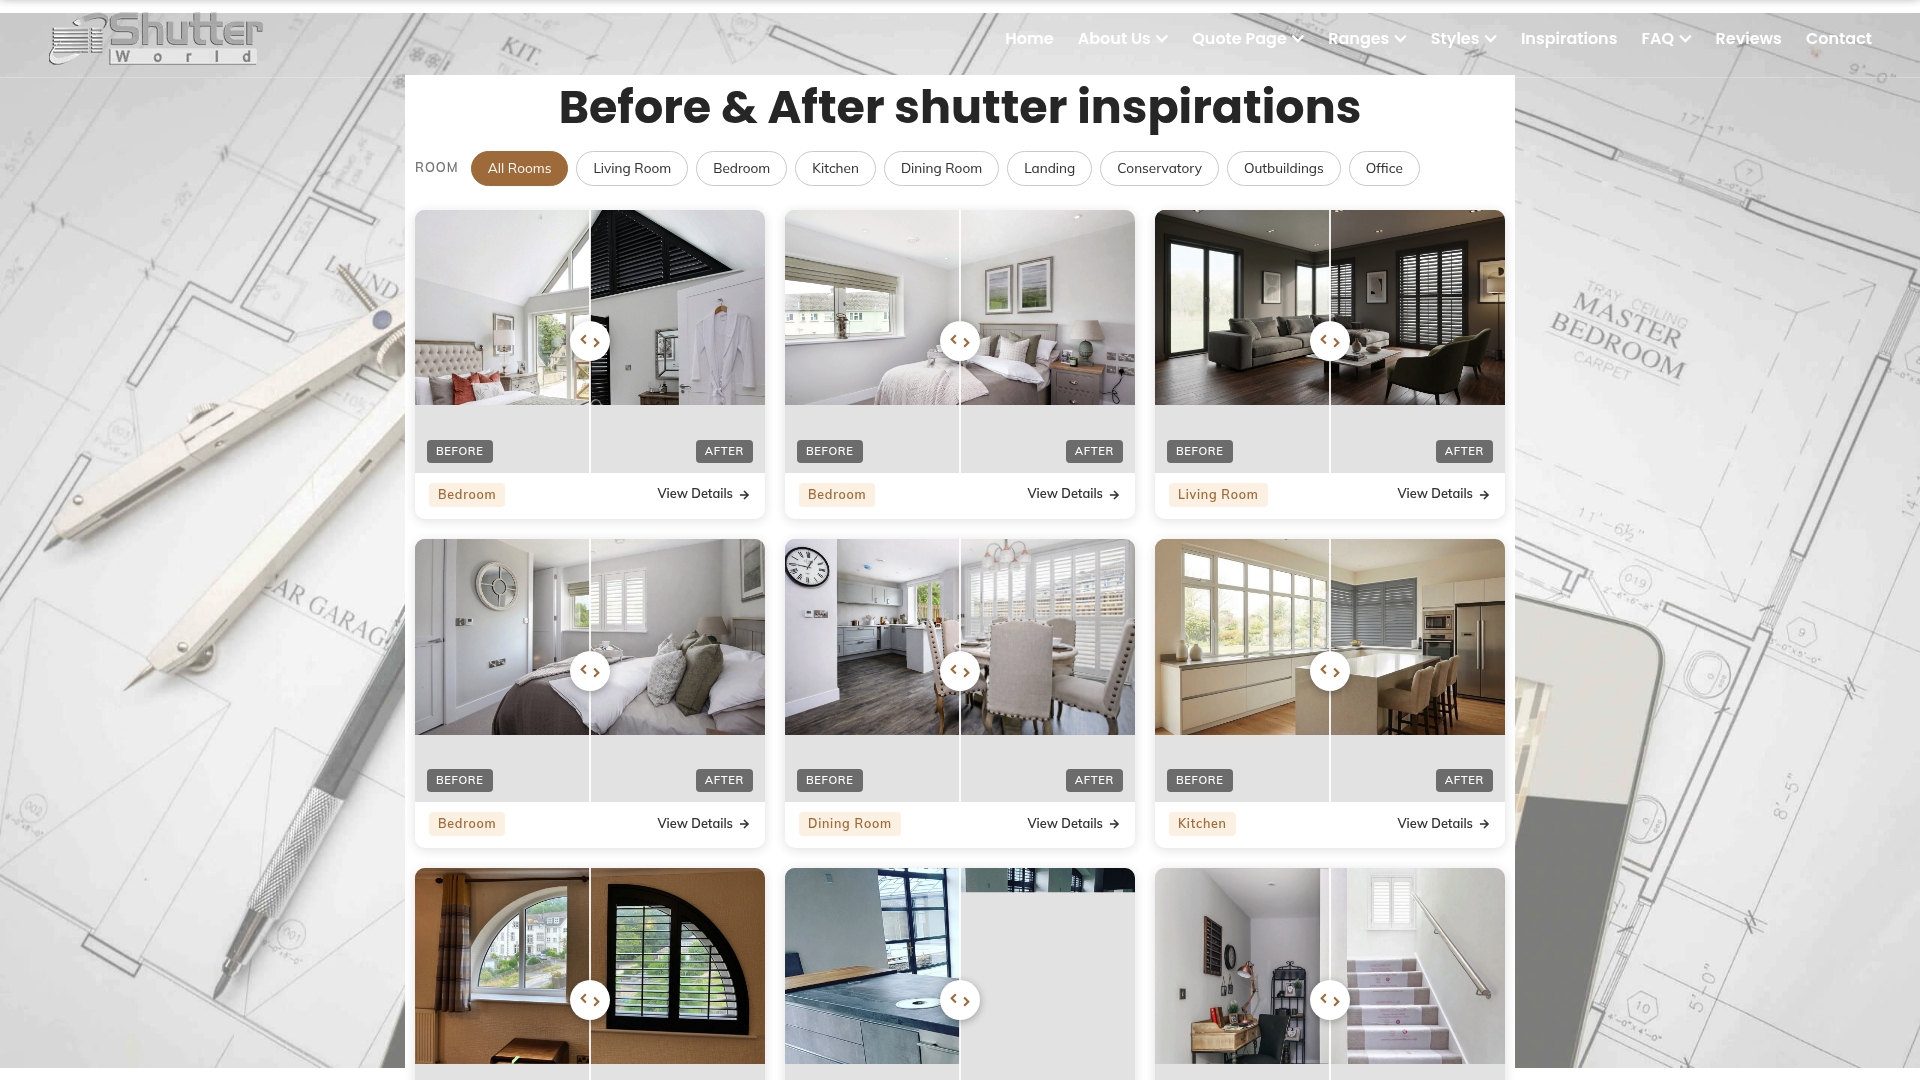
Creating a precise shutter specification is entirely achievable with the right guidance, but it demands time, attention, and confidence with a tape measure. Shutterworld offers a fully managed service that covers every stage, from a professional in-home survey and verified measurements through to expert installation and a workmanship guarantee. Whether you are fitting plantation shutters across a new build or replacing tired window coverings in a period property, Shutterworld’s team brings over 25 years of bespoke craftsmanship to every project. Explore the full range of made-to-measure options and book your free consultation today.
FAQ
What measurements do I need for shutter specifications?
You need width measured at three heights, height measured at three widths, recess depth, both diagonal measurements, and the clearance distance to any obstructions. Always record the smallest width and height figure to prevent fitting issues.
How do I choose the right louvre size for my shutters?
The 3.5-inch louvre suits the majority of interior windows, balancing light control with an open view. Choose 4.5-inch louvres only where you have sufficient clearance for the wider rotation arc, particularly around door handles.
Do I need a professional survey for non-standard windows?
For arched, angled, bay, or otherwise irregular windows, a professional survey is strongly recommended. These openings require templates or CAD drawings in addition to written measurements to produce a specification the manufacturer can work from accurately.
What is the minimum recess depth for inside-mount shutters?
Inside-mount shutters require a minimum recess depth of 2.75 inches to accommodate shutter thickness and allow the louvres to rotate freely without striking the glass.
Why does panel thickness matter in a shutter specification?
Panel thickness determines whether the chosen hardware fits correctly and whether the louvres can rotate without binding. MDF shutters are typically specified at 18 to 20 mm and solid wood at 20 to 22 mm, with each range matched to specific hinge tolerances and operational requirements.