
Shutter louver angle benefits: the UK homeowner’s guide

Shutter louver angle benefits
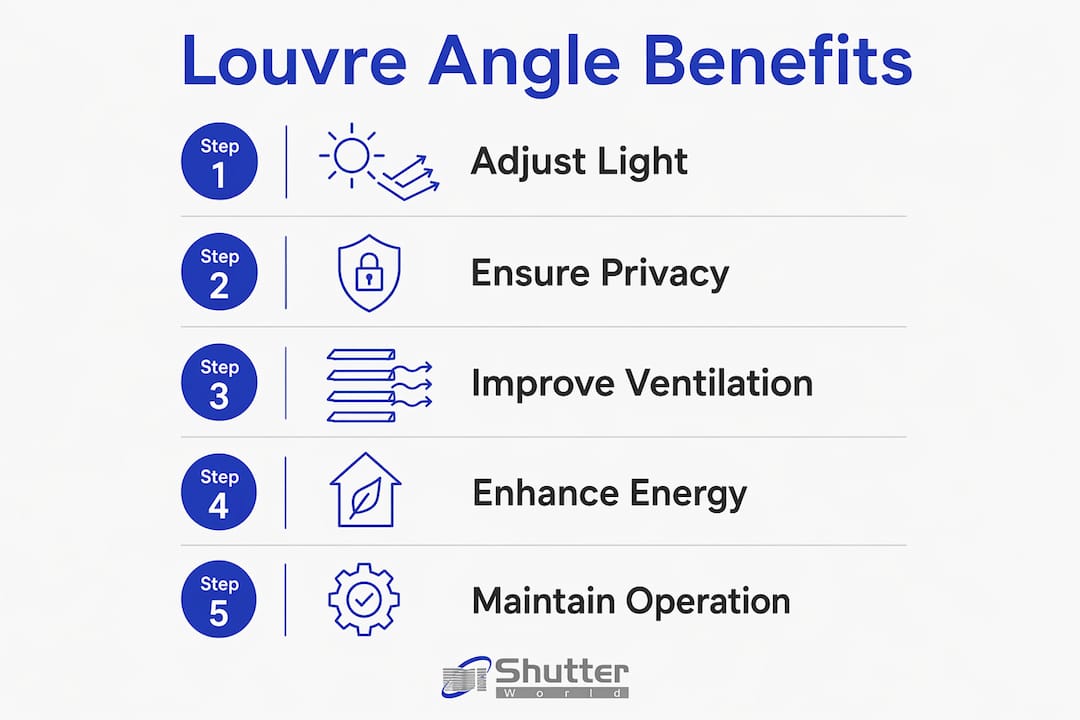
Adjusting the tilt of your shutter louvres is one of the most effective ways to control natural light, privacy, ventilation, and thermal comfort in your home. The core shutter louvre angle benefits are practical and immediate: a 45° upward tilt delivers soft, glare-free light while blocking street-level views; closing louvres fully at night provides complete privacy; and seasonal angle adjustments can meaningfully reduce your heating and cooling costs. Research confirms that optimised louver angles can reduce thermal energy consumption by over 30% on east, west, and south-facing façades. Here is what every UK homeowner needs to know.
Key louvre angle advantages at a glance:
- Light control: Tilting louvres upward at 45° directs sunlight toward the ceiling, creating diffused, comfortable illumination without harsh glare.
- Privacy: Angling louvres upward means anyone outside sees only the slats, not into your room, even in full daylight.
- Ventilation: Partially open louvres allow air to circulate freely, reducing stuffiness without sacrificing privacy.
- Energy efficiency: Correct angles shade interiors in summer and admit warming light in winter, cutting energy demand across seasons.
- Street appeal: Well-positioned louvres give windows a clean, considered look from the outside, enhancing your home’s exterior character.
How to adjust your shutter louvres for the best light and privacy
Getting the most from your shutters comes down to knowing which angle suits each situation. The good news is that adjusting louvres is straightforward once you understand the mechanics and the outcomes each position delivers.
Adjustment technique: Most shutters use a centre tilt rod. Grasp the rod and push it up or down to move all louvres simultaneously. On hidden-tilt shutters, simply press any single louvre and the rest follow in unison. Both methods give you smooth, even control across the full panel.
Recommended angles by outcome:
- Soft, diffused light: Tilt louvres upward at 45°. This directs sunlight toward the ceiling rather than into your eyes, brightening the room without glare.
- Maximum privacy with some light: Set louvres to a partial upward position. You gain privacy while warm air circulates more freely through the room.
- Maximum light, minimum privacy: Tilt louvres fully downward. Light floods in directly, though visibility from outside increases.
- Complete privacy and darkness: Close louvres fully in the upward position. They click together, redirecting any residual light toward the ceiling.
- Reducing low-angle glare: Tilt louvres downward when the sun is low, particularly on west-facing windows in the late afternoon.
Seasonal adjustments matter. Fixed louvres set between 45° and 75° cannot balance winter heating needs and summer cooling demands simultaneously. In summer, angle louvres to shade the glass during peak hours. In winter, open them fully during daylight to admit warming sunlight, then close them at dusk to retain heat.
Maintenance for smooth operation: Wipe louvres regularly with a soft, dry cloth to prevent dust build-up that can stiffen the tilt mechanism. Check that tilt rods move freely and that no louvre has shifted out of alignment with its neighbours. A louvre that drags or sticks usually needs only a gentle realignment rather than replacement.
Pro Tip: For a home office or reading room, set louvres at a 45° upward tilt and fine-tune by a few degrees until reflected light from the ceiling feels even across your desk. This eliminates screen glare without closing the room to natural light.
How louvre size affects light control and the look of your windows
The width of your louvres shapes both the character of the light in a room and the visual weight of the shutter itself. Choosing the right louvre size is as much a design decision as a functional one.
- Larger louvres (89mm and above): When open, they admit generous sweeps of natural light and offer expansive views through the window. They suit living rooms and larger windows where an open, airy feel is the priority. The visual lines are bold and contemporary.
- Smaller louvres (47mm–63mm): These give finer, more graduated control over light filtration. They suit period properties and smaller windows where a more traditional or delicate appearance is appropriate.
- Louvre spacing and thickness: Closer spacing between slats increases shading and reduces airflow when louvres are partially open. Wider spacing lets more air through and suits rooms where ventilation is a priority, such as kitchens or conservatories.
- Split-tilt louvres: This design divides the shutter panel into upper and lower sections, each adjustable independently. Close the lower louvres for privacy at street level while leaving the upper louvres open to draw in natural light from above. Split-tilt shutters are particularly well suited to bedrooms and bathrooms, where privacy and daylight are equally important.
- Visual impact: Larger louvres create a cleaner, more minimal look on the window. Smaller louvres produce a more intricate, layered appearance. Neither is universally better; the right choice depends on your room’s proportions and the architectural style of your home.
Keeping your shutter louvres in top condition
Well-maintained louvres move smoothly, look pristine, and last for many years. The care routine is simple, but consistency is what preserves both function and appearance over time. Shutter World’s shutter functionality tips cover material-specific cleaning in detail, but the principles below apply to most interior shutters.
- Cleaning by material: Painted MDF and polypropylene-coated shutters clean well with a lightly dampened microfibre cloth. Hardwood shutters benefit from a dry cloth first, followed by a wood-appropriate cleaner applied sparingly. Never saturate any shutter with water.
- Tilt rod and hinge checks: Every few months, gently test each tilt rod for smooth movement. If a rod feels stiff, a small amount of silicone-based lubricant applied to the pivot points usually resolves it. Avoid oil-based lubricants, which attract dust and can stain painted finishes.
- Inspecting for damage: Run your hand along each louvre to check for warping or cracking, particularly after periods of high humidity. A warped louvre will not sit flush with its neighbours and will let in unwanted light at the edges.
- Preventing warping: Keep shutters away from direct steam sources such as kettles and shower heads. In rooms prone to condensation, ensure adequate ventilation to protect the louvres from sustained moisture exposure.
- Seasonal care: In autumn and winter, when central heating dries the air, hardwood louvres can contract slightly. Check that tilt rods still move freely and that louvres close flush. In summer, high humidity can cause minor swelling; if louvres feel tight, allow the room to air before forcing adjustment.
Bespoke shutter solutions for complex and unusual windows
Standard louvre angle advice works well for straightforward rectangular windows. For angled, arched, bay, skylight, or conservatory windows, the geometry changes entirely, and the louvre configuration needs to be engineered to match.

Shutter World has spent over 25 years designing and installing bespoke shutters for precisely these situations. Arched windows, for example, require louvres that follow the curve of the frame while still tilting freely. Bay windows need panels that sit at the correct angle to each facet, with louvre positions calculated to deliver consistent light control across the whole bay. Conservatory shutters must manage intense solar gain while allowing ventilation, which demands careful louvre sizing and angle specification from the outset.
Custom louvre configurations also allow Shutter World to specify split-tilt panels for windows where standard full-panel adjustment would be impractical. A tall sash window in a Victorian terrace, for instance, benefits from independent upper and lower louvre control in a way that a single tilt rod simply cannot deliver.
Pro Tip: If your home has a bay or angled window, request a bespoke survey before choosing louvre size. The angle of each panel relative to the light source affects which louvre width will perform best, and this is something that only an in-person assessment can determine accurately.
Explore bespoke shutter options to see how Shutter World engineers custom solutions for the most challenging window shapes across the UK.
Shutter World’s plantation shutter service covers the full journey from in-home survey to expert installation, with product and workmanship guarantees included as standard. Whether your windows are straightforward or architecturally complex, our team will specify the right louvre size, tilt configuration, and material for your home. Book your free consultation today and discover what a difference the right louvre angle makes.
Key takeaways
Adjustable louvre angles deliver measurable gains in light quality, privacy, and energy efficiency that fixed window coverings simply cannot match.
| Point | Details |
|---|---|
| Optimal angle for light and privacy | A 45° upward tilt provides diffused, glare-free light while blocking street-level views effectively. |
| Energy savings through correct angles | Optimised louver angles can significantly reduce thermal energy consumption on east, west, and south-facing façades. |
| Louvre size shapes room character | Larger louvres (89mm+) suit open, contemporary spaces; smaller louvres suit period properties and finer light control. |
| Split-tilt for nuanced control | Independent upper and lower louvre adjustment suits bedrooms and bathrooms where privacy and daylight are both priorities. |
| Seasonal adjustment is necessary | Fixed angles between 45° and 75° cannot balance winter heating and summer cooling needs; manual seasonal adjustment is superior. |
FAQ
What is the best angle for shutter louvres?
A 45° upward tilt is the most versatile position for most rooms, delivering soft, diffused light while maintaining privacy from street level. For maximum light with less privacy, tilt louvres fully downward; for complete privacy and darkness, close them fully in the upward position.
Are there any disadvantages to using louvres?
The main limitation is that fixed louvres cannot adapt to seasonal changes in sun angle, which means they may over-shade in winter or under-shade in summer. Adjustable louvres resolve this entirely, allowing you to fine-tune the angle as conditions change throughout the year.
Why do some homeowners move away from shutters?
Shutters sometimes fall out of favour when louvres are not adjusted correctly, leading homeowners to assume the product is not working well. In practice, a shutter with properly configured louvres outperforms most alternative window coverings for light control, privacy, and thermal performance.
How do louver angles affect ventilation and airflow?
Partially open louvres at a shallow angle allow air to pass through the window while maintaining a degree of privacy. Closing louvres fully restricts airflow, so in warmer months, keeping louvres at a partial tilt balances ventilation with comfort.