
How to clean and maintain bespoke interior shutters

Shutter maintenance and cleaning
TL;DR:
- Regular, gentle cleaning and maintenance extend shutter lifespan and preserve their aesthetic and functional qualities.
- Different shutter materials require specific cleaning methods to prevent damage like warping, scratches, or discolouration.
- Ongoing care includes routine dusting, periodic deep cleaning, lubrication, and environmental controls to prevent climate-related issues.
There is nothing quite as deflating as noticing that your beautifully crafted interior shutters have lost their lustre. Dust-clogged louvres, sticky slats, or faded paintwork can quietly erode the elegance that drew you to bespoke window solutions in the first place. The good news is that a consistent, well-informed maintenance routine makes a remarkable difference, and it does not require specialist equipment or hours of your time. This guide walks you through everything you need to know, from preparation and the right products to step-by-step cleaning, seasonal upkeep, and troubleshooting the most common pitfalls.
Table of Contents
- Why bespoke shutters need special maintenance
- Essential tools and cleaning products checklist
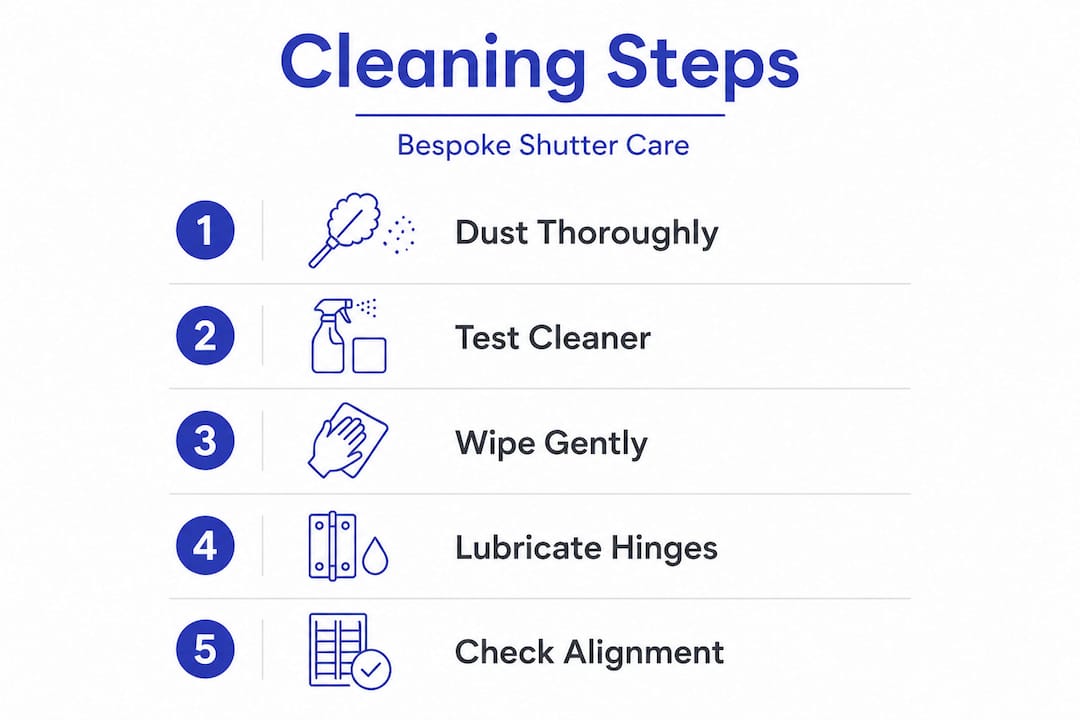
- Step-by-step process for cleaning interior shutters
- Ongoing maintenance: Keeping shutters spotless and trouble-free
- Troubleshooting common shutter cleaning and maintenance mistakes
- Why regular shutter care delivers more than a beautiful window
- Get help or upgrade: Professional shutter solutions tailored to you
- Frequently asked questions
Key Takeaways
| Point | Details |
|---|---|
| Use gentle cleaning tools | A soft cloth or brush protects bespoke shutter finishes from scratches and damage. |
| Tailor routines to material | Wood, aluminium, and composite shutters each need their own approach for lasting results. |
| Clean and check regularly | Consistent dusting and regular maintenance prevent costly repairs and preserve shutter beauty. |
| Avoid harsh chemicals | Skip bleach or strong sprays, which can warp or discolour delicate surfaces. |
| Address problems early | Quick fixes for sticky slats or loose hardware stop small issues from becoming bigger headaches. |
Why bespoke shutters need special maintenance
Your bespoke shutters are not simply an off-the-shelf product. They are precision-crafted to your exact window dimensions, finished with materials chosen for performance and aesthetics, and fitted with hardware that must operate smoothly for years to come. Following our shutter maintenance tips ensures you preserve that investment correctly from the outset.
The materials used in bespoke shutters vary considerably, and each responds differently to cleaning agents and moisture. Hardwood shutters, such as those in our Montana range, are naturally porous and can warp or discolour if exposed to excess water. Aluminium shutters resist moisture well but scratch easily with abrasive cloths. Composite shutters, including MDF with a polypropylene coating, offer strong water resistance but can be damaged by solvent-based cleaners that strip the coating. Understanding these differences, as covered in our bespoke shutters guide, is the foundation of effective care.
Using the wrong approach can cause real harm. Common risks include:
- Warping and swelling in natural wood from over-wetting
- Discolouration and finish lift caused by bleach or solvent sprays
- Jamming mechanisms resulting from grit being pushed into pivot points during cleaning
- Scratched surfaces from rough cloths or scouring pads
- Corrosion of metal hardware from acidic or alkaline cleaning products
| Material | Key maintenance consideration |
|---|---|
| Hardwood | Minimal moisture, no bleach, occasional conditioning oil |
| Aluminium | Non-abrasive cloths, mild detergent, rinse thoroughly |
| Composite/MDF with coating | Damp cloth only, no solvents, gentle cleaning agents |
Pro Tip: Always dust your shutters thoroughly before applying any liquid cleaner. Loose debris mixed with moisture turns into a fine sludge that works its way into joints and louver mechanisms, making them harder to operate over time. Many house cleaning hacks recommend this dry-first rule across most household surfaces for the same reason.
Essential tools and cleaning products checklist
Understanding the special care needs of your shutters, the right tools and products make all the difference between a result that restores and one that damages.
| Shutter material | Recommended tools | Recommended products |
|---|---|---|
| Hardwood | Microfibre cloth, soft-bristle brush | Mild wood soap, beeswax polish |
| Aluminium | Microfibre cloth, soft sponge | Mild washing-up liquid diluted in water |
| Composite/coated MDF | Microfibre cloth, fine brush | Diluted mild detergent, warm water |
Microfibre cloths are arguably the single most valuable tool in your kit. Their ultra-fine fibres lift dust and grease without scratching, and they leave very little moisture behind compared with standard cotton cloths. A soft-bristle paintbrush is equally useful for getting into the channels between louvres and around the tilt rod without applying pressure. For detailed guidance on routine cleaning, our dedicated plantation shutter cleaning resource covers product choices in depth.
When it comes to what not to use, the list matters just as much:
- Bleach: Strips colour and damages wood grain on natural shutters
- Abrasive powders or scourers: Leave permanent scratches on all shutter finishes
- Solvent-based sprays: Dissolve the coating on composite shutters
- Furniture polish with silicone: Creates a residue that attracts dust faster
- Dripping-wet cloths: Introduce excess moisture at joints and pivot points
Safe household alternatives include a solution of a few drops of mild washing-up liquid in warm water, white vinegar diluted 1:10 for light grease on aluminium, and a barely damp cloth with a drop of baby shampoo for painted wood surfaces. Building cleaning habits that include a weekly dust and a monthly check means you rarely need to reach for anything stronger.
Pro Tip: Before applying any new product to your shutters, test it on a small, concealed section, such as the back of a lower panel, and wait 10 minutes. If there is no change in colour, sheen, or texture, you can proceed with confidence across the full surface.
Step-by-step process for cleaning interior shutters
With your kit ready, let’s get hands-on with a step-by-step routine that works for any shutter type.
Routine cleaning helps prevent buildup that damages shutters, and following a logical sequence ensures you do not redistribute dust or miss areas that are easy to overlook.
- Tilt louvres to a flat, horizontal position. This exposes the maximum surface area and makes dusting more effective.
- Dry-dust each louvre from top to bottom using a microfibre cloth or soft brush. Work from the top panel downwards to prevent dust falling onto already-cleaned sections.
- Flip the louvres to the opposite angle and repeat the dry-dust on the reverse side.
- Wring out your microfibre cloth thoroughly so it is barely damp, not wet. Add your chosen cleaning solution and wipe each louvre individually.
- Clean the frame and stiles (the vertical uprights) using the same damp cloth, paying particular attention to corners where dust and grease accumulate.
- Dry immediately with a clean, dry microfibre cloth. Never leave moisture sitting on wood or in pivot points.
- Operate the tilt rod gently several times to ensure it moves freely and no residue has entered the mechanism.
- Check hardware and hinges for any stiffness or signs of moisture ingress and address immediately.
For wooden shutter cleaning, step six is particularly critical. Natural wood can absorb surface moisture quickly, and even a light sheen of water left on the surface can cause the finish to cloud or the grain to raise slightly over repeated cleaning sessions.
Important: Never use a saturated cloth or spray liquid directly onto painted or natural wood shutters. Excess moisture causes swelling at joints, finish blistering, and long-term warping. If you can wring water out of your cloth, it is still too wet.
Pro Tip: Plan your cleaning session for the morning. Natural light makes it easier to spot streaks and missed areas, and good air circulation during daylight hours helps shutters dry faster, reducing the risk of moisture lingering in joints or at the base of the frame.
Following house cleaning tips for other surfaces suggests a top-to-bottom, left-to-right method, and the same logic applies perfectly to shutters, keeping your workflow efficient and consistent.
Ongoing maintenance: Keeping shutters spotless and trouble-free
A single deep clean is not enough. Here is how to ensure your effort lasts, and minor issues do not become costly problems.
Regular checks and simple tweaks reduce the need for repairs significantly, and the time investment is genuinely modest when built into an existing routine. We recommend a simple monthly walkthrough covering the following:
- Louvre movement: Each slat should tilt smoothly with light pressure. Stiffness suggests dust in the mechanism or a dry pivot.
- Tilt rod function: The rod should move the full range without catching or skipping louvres.
- Frame integrity: Run your hand around the frame edge to check for any lifting, separation, or moisture blistering.
- Finish condition: Look for discolouration, scratches, or fading, particularly on south-facing windows.
- Hardware security: Hinges and magnets on bi-fold shutters should feel firm with no play.
The UK climate presents specific challenges that go beyond a standard cleaning routine. Autumn and winter bring elevated indoor humidity from central heating running alongside cold, damp air, which is particularly hard on hardwood shutters. We recommend reducing humidity near shutters using a dehumidifier in rooms prone to condensation, such as kitchens and bathrooms. In summer, prolonged direct sunlight can bleach finishes and cause warping in south-facing rooms. Our guide to protecting shutters from sun covers practical strategies including UV window film and shutter positioning.

For unusual window configurations such as arched or angled frames, the shutter repair tips resource addresses specific maintenance considerations where standard routines may need adapting. Shaped shutters often have more complex hinge arrangements that benefit from slightly more frequent checks.
Pro Tip: Use a silicone-based spray lubricant, available from any hardware store, on pivot points and hinge pins once or twice a year. Never use oil-based lubricants; they attract dust rapidly and create a sticky residue that accelerates wear rather than preventing it.
Our shutter maintenance checklist gives you a printable reference so you can tick off each task as you go, turning upkeep into a satisfying habit rather than an occasional scramble.
Troubleshooting common shutter cleaning and maintenance mistakes
Even with great routines, sometimes challenges arise. Let’s tackle the most common missteps and their solutions.
Solutions for sticky slats or faded paint are simple and often DIY, and knowing which problems you can resolve yourself saves both time and money. A detailed shutter repair guide provides further support if issues persist beyond these quick fixes.
Quick fixes for common problems:
- Watermarks on wood: Buff gently with a barely damp cloth, then immediately with a dry one. A small amount of beeswax polish can restore the sheen.
- Sticky or stiff louvres: Apply silicone spray sparingly to the pivot point, then work the louvre back and forth gently to distribute it.
- Sludge in mechanism: Use a fine, dry brush to dislodge debris, then vacuum with a brush attachment before re-lubricating.
- Light scratches on painted surfaces: Touch up with matching paint from your original supplier, applying a thin coat with a fine artist’s brush.
- Grease smears on aluminium: Dampen a microfibre cloth with diluted white vinegar and buff in the direction of the grain.
| Common mistake | Risk | Safer alternative |
|---|---|---|
| Using bleach on wood | Discolouration and grain damage | Mild soap and warm water |
| Soaking shutters with spray | Warping and joint damage | Barely damp cloth only |
| Abrasive cloths on coated surfaces | Permanent scratching | Microfibre or soft sponge |
| Oil lubricant on pivots | Dust and grime accumulation | Silicone-based spray |
| Ignoring stiff louvres | Mechanism breakage | Early lubrication and adjustment |
For a broader reference on resolving household cleaning challenges, a cleaning troubleshooting guide offers useful context. Knowing when to call a professional matters too. If louvres have cracked, the frame has warped significantly, or the tilt mechanism has seized entirely, attempting forceful DIY repairs risks irreversible damage to your bespoke investment.
Why regular shutter care delivers more than a beautiful window
Here is a perspective we rarely see discussed: most homeowners think of shutter maintenance purely as a cosmetic task, something you do when guests are coming or when the dust becomes impossible to ignore. We disagree, and after more than 25 years fitting and supporting bespoke shutters across the UK, we have seen the full picture play out repeatedly.
Well-maintained shutters contribute directly to a home’s thermal performance. Clean, properly aligned louvres close flush against each other, creating a far more effective barrier against draughts than louvres that have warped or stiffened through neglect. In practical terms, this means lower energy bills, particularly during the colder months when heating costs peak. Shutters that operate correctly also protect your interiors. Precisely angled louvres reduce UV exposure, slowing the fading of carpets, upholstery, and artwork. Those savings are invisible but very real.
There is also a property value argument that rarely gets made explicitly. Homes with immaculate, fully functioning shutters present far better during viewings. Estate agents across the UK consistently note that high-quality window dressings in good condition contribute to a buyer’s perception of overall upkeep. A shutter that sticks, rattles, or looks tired tells a different story entirely, even if everything else in the room is pristine.
The hidden benefits of custom shutters extend well beyond aesthetics, and caring for them properly is how you keep those benefits active year after year. A few minutes each week, and a slightly more thorough session every few months, secures years of comfort, style, and genuine financial return. That is not maintenance. That is a straightforward investment in one of your home’s most valuable features.
Get help or upgrade: Professional shutter solutions tailored to you
If your shutters have reached the point where a professional eye would make all the difference, or if you are considering upgrading your current window solutions to something truly exceptional, we are here to help.

At Shutter World, our team of specialists can assess your existing shutters, advise on refurbishment where appropriate, and guide you through our full range of bespoke internal shutters designed to transform any room. Whether you are drawn to the timeless appeal of plantation style or need a precision-engineered solution for an unusual window shape, our window shutters collection covers every requirement and budget. Explore our popular plantation shutters range and book your free in-home survey today. Your windows deserve nothing less than a flawless finish, backed by a team that genuinely cares about getting it right.
Frequently asked questions
How often should I clean my interior shutters?
You should dust weekly and deep clean every two to three months for best results, as routine maintenance extends lifespan and keeps your shutters looking pristine between deeper sessions.
What should I avoid when cleaning wooden shutters?
Avoid soaking with water, bleach, and harsh sprays, as safe methods prevent damage to the natural grain and finish, preventing warping or discolouration that can be costly to remedy.
Can I fix sticky or jammed shutter slats myself?
Most sticky slats can be freed with gentle cleaning and silicone lubrication, though solutions for sticky slats are often straightforward DIY fixes, with severe or structural cases best left to a professional.
What’s the best product for cleaning aluminium shutters?
Use a mild, non-abrasive cleaner such as diluted washing-up liquid applied with a soft microfibre cloth, rinsing lightly and drying immediately to maintain the finish and prevent streaking.
How do I prevent sun damage to my shutters?
Adjust slats regularly to redirect intense sunlight and consider UV-protective window film for south-facing rooms, as adjusting and UV-protective care significantly reduce fading and finish deterioration over time.
Recommended
- How to Clean and Maintain Your Wooden Shutters for Longevity | Shutter World
- How to Clean Plantation Shutters: Step-by-Step Guide | Shutter World
- 7 Expert Shutter Maintenance Tips for Lasting Style and Value | Shutter World
- How to Repair Broken Shutters for Bespoke Windows | Shutter World
- 7 Must-Know Tips for Seasonal Home Maintenance Success