
Shutter panel customisation: your complete 2026 guide

TL;DR:
- Shutter panel customization involves tailoring panel type, louvre size, configuration, and finish to suit a home’s architecture and functional needs. Proper measurement, structural reinforcement, and choosing the right configuration ensure a perfect fit and long-term durability. Focusing on room use and aesthetic coherence results in shutters that enhance light control, privacy, and property value over time.
Shutter panel customisation is the process of tailoring your window shutters’ design, dimensions, materials, and configuration to suit your home’s architecture, lifestyle, and aesthetic preferences. Done well, it transforms a functional window covering into a built-in design feature that improves light control, privacy, thermal performance, and long-term property value. The decisions you make across panel style, louvre size, colour, and configuration are not interchangeable. Each one shapes how your shutters look, how they perform, and how long they last. This guide walks you through every variable so you can make choices with confidence.
What are the main shutter panel types and how do they affect your home?
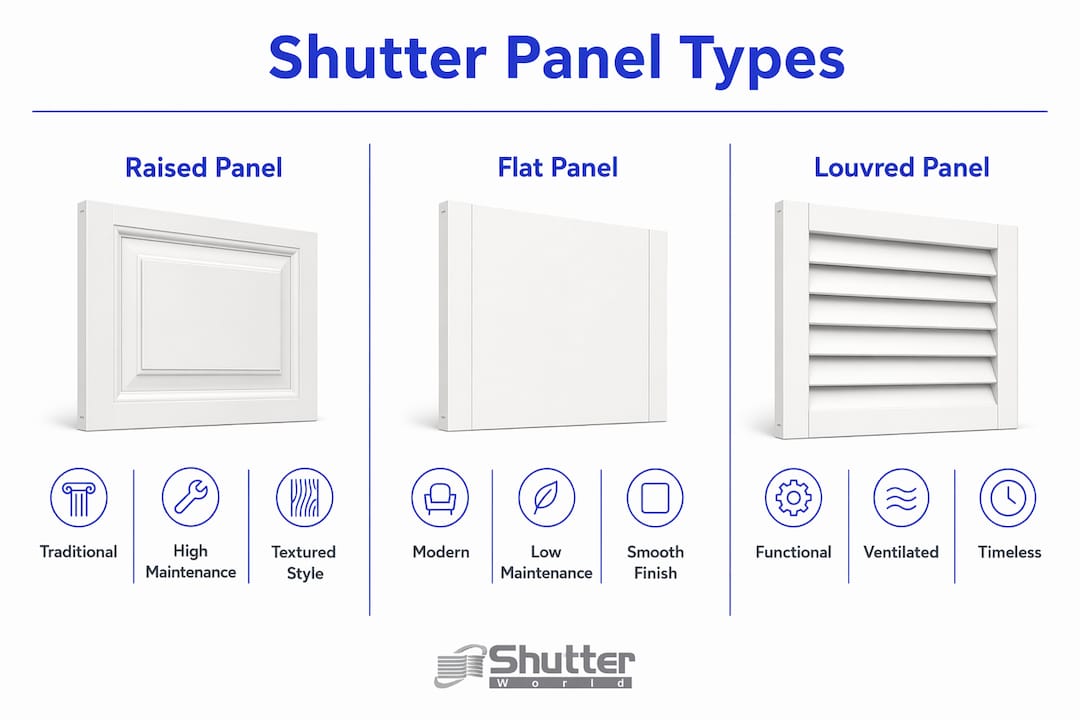
Shutter panel customisation begins with choosing between the two dominant panel designs: raised panel and flat panel. Raised panels suit traditional architectural styles like colonial and craftsman homes, where the moulded profile adds depth and period character. Flat panels, by contrast, align with contemporary and transitional interiors, where clean lines and minimal ornamentation are the design language. Choosing the wrong panel type for your home’s architecture is one of the most common and costly mistakes homeowners make.
Beyond the visual profile, material choice defines durability and maintenance demands. The three most widely used materials are:
- MDF with a polypropylene coating (such as Shutterworld’s Seattle range): moisture-resistant, stable, and well-suited to kitchens and bathrooms
- Premium hardwood (such as Shutterworld’s Montana range): richer grain, superior rigidity, and a genuinely luxurious finish for living rooms and bedrooms
- Composite timber: a middle ground offering hardwood aesthetics with improved resistance to humidity
| Panel type | Best architectural fit | Maintenance level |
|---|---|---|
| Raised panel | Colonial, craftsman, Victorian | Low to moderate |
| Flat panel | Contemporary, transitional, Scandi | Low |
| Louvred panel | Plantation, coastal, broad appeal | Low |
Pro Tip: If your home mixes period features with a modern extension, use flat panels in the new space and raised panels in the original rooms. The contrast reads as deliberate rather than inconsistent.
Louvred panels, the style most associated with plantation shutters, offer the greatest functional flexibility because the angled slats adjust independently of the panel frame. This makes them the preferred choice for rooms where light and privacy demands shift throughout the day.
How does panel configuration affect function and visual balance?
Panel configuration is where shutter design becomes genuinely modular. Adjusting louvres, configurations, and mullions essentially re-engineers how light and privacy behave at your window. The configuration you choose must account for room clearance, window proportions, and how you actually use the space.
The five principal opening styles are:
- Swinging panels: hinged at the side, opening like a door. Best for standard rectangular windows with adequate clearance beside the frame.
- Bi-fold panels: fold back in sections, ideal for wider windows or bay configurations where a full swing would obstruct furniture.
- Sliding panels: track-mounted and move laterally. Suited to patio doors and very wide openings.
- Split-tilt: upper and lower louvre banks tilt independently, giving you light from above while maintaining eye-level privacy.
- Double-hung: two independently operable panels stacked vertically, mirroring a sash window’s operation.
Panel configuration should be chosen based on room clearance and how the windows and rooms are used, not purely on visual preference. A swinging panel in a narrow hallway will constantly obstruct movement. A sliding panel on a bedroom window may feel industrial in a period property.
Mullion placement is a detail that most homeowners overlook until they see the finished result. Centre mullions suit windows roughly twice as tall as wide, while offset mullions work better for narrow, tall windows where a centred division would create awkward proportions. Getting this right is the difference between shutters that look bespoke and shutters that look like an afterthought.
Pro Tip: For bay windows, use bi-fold panels on the angled side sections and swinging panels on the central face. This preserves the bay’s architectural drama while keeping operation practical.
What measurement steps ensure a perfect shutter panel fit?
Measurement is where most DIY shutter projects fail. Accurate measurement requires the glass opening size, frame projection depth, and reveal width. Measuring the glass alone consistently causes fitting problems because it ignores the physical space the shutter frame and panel must occupy.
Follow this sequence for reliable results:
- Measure the glass opening: width at top, middle, and bottom; height at left, centre, and right. Use the smallest dimension in each direction.
- Measure the reveal depth: the distance from the glass face to the front of the window surround. This determines whether a face-fix or reveal-fix frame is appropriate.
- Check frame projection: identify any handles, locks, or restrictors that the open panel must clear without obstruction.
- Note any out-of-square corners: a variance of more than 5mm across the height or width requires a custom-shaped frame rather than a standard rectangle.
The most crucial measurement involves frame projection and reveal depth, because these determine whether panels can open fully without catching on window furniture. Skipping this step produces shutters that look correct when closed but bind or scrape when operated.
Panels taller than 130cm require mid-rails and wider panels need T-posts for structural integrity. Without these reinforcements, large panels sag over time, causing louvres to misalign and tilt rods to bind. For arched or angled windows, custom fabrication uses physical templates to guarantee that louvres fit evenly and rotate smoothly across the curved or angled frame.
Pro Tip: Book a professional in-home survey rather than relying solely on your own measurements. Shutterworld’s survey service catches the frame projection and reveal details that tape measures alone cannot resolve.
What louvre, colour, and finish options personalise your shutters?
Louvre size has a direct and measurable effect on how a room feels. Standard louvre sizes for plantation shutters are 2.5″, 3.5″, 4.5″, and 5.5″, with larger sizes preferred for modern open-plan spaces. Larger louvres create a more expansive view when open and a bolder visual statement when closed. Smaller louvres suit cottage-style or period properties where a finer, more traditional profile is appropriate.
Colour and finish selection is where personal style meets architectural coherence. The principal options are:
- Factory-painted white or off-white: the most popular choice in the UK, suits virtually any interior and photographs well for property listings
- Painted custom colour: matched to Farrow and Ball, Little Greene, or RAL references for precise coordination with walls and joinery
- Stained hardwood: preserves the natural grain and warmth of timber, suited to traditional or Scandi-influenced interiors
- Two-tone finish: contrasting frame and louvre colours, increasingly popular in 2026 for adding depth to neutral schemes
| Finish type | Best suited to | Durability |
|---|---|---|
| Factory white paint | Contemporary, coastal, neutral | High |
| Custom matched paint | Period, designer, bespoke schemes | High |
| Natural wood stain | Traditional, Scandi, rustic | Moderate to high |
| Two-tone | Statement interiors, 2026 trends | High |
Beyond aesthetics, finish choice affects thermal performance. Interior plantation shutters improve energy efficiency by 3 to 6 percent depending on materials and climate. This is a meaningful saving over the lifespan of the product, and it reinforces the case for investing in quality materials rather than the cheapest available option. You can read more about this in Shutterworld’s guide to energy-efficient shutters for UK homes.
How does functional intent shape shutter panel design?
Functional intent should guide shutter design decisions more than aesthetics, according to manufacturers. This is a principle that experienced installers apply consistently but that homeowners frequently reverse. The question to ask first is not “what will look best?” but “how will I actually use these shutters every day?”
A bedroom window demands different performance from a kitchen window. In a bedroom, split-tilt operation lets you admit morning light from the upper louvres while keeping the lower section closed for privacy. In a kitchen, full-height swinging panels that open completely make more sense because you want unobstructed light and ventilation during the day. For a cohesive approach across your home, consider how shutter panel choices interact with other joinery elements like doors and cabinetry.
Hardware quality is the detail most often sacrificed in budget installations. Tilt rods, hinges, and magnetic catches that feel solid on day one but flex under daily use will cause louvres to droop and panels to misalign within two to three years. Specifying stainless steel or brass hardware adds modest cost but extends the functional life of the shutter significantly.
Pro Tip: If you have young children or pets, choose a hidden tilt mechanism rather than a centre tilt rod. It removes a snagging point and gives the panel a cleaner, more contemporary appearance.
Key functional considerations to resolve before ordering:
- Room clearance beside and above the window frame
- Whether privacy or light control is the primary daily need
- Frequency of operation (daily use demands higher-grade hardware)
- Whether the window is a fire escape route (affects panel opening direction)
Key takeaways
Successful shutter panel customisation depends on matching panel type, configuration, measurement precision, and finish to both your home’s architecture and your daily functional needs.
| Point | Details |
|---|---|
| Match panel type to architecture | Raised panels suit traditional homes; flat panels suit contemporary and transitional styles. |
| Measure beyond the glass | Include frame projection and reveal depth to avoid fitting and operation problems. |
| Size louvres to the room | Larger louvres (4.5″ to 5.5″) suit open-plan spaces; smaller sizes suit period properties. |
| Let function lead design | Choose configuration based on room clearance and daily use before considering aesthetics. |
| Invest in structural reinforcement | Panels over 130cm need mid-rails; wide spans need T-posts to prevent long-term sagging. |
What I’ve learnt from years of watching shutter projects go wrong
After seeing hundreds of shutter installations, the pattern that stands out most clearly is this: the projects that disappoint are almost never the result of a bad product. They are the result of a decision made in the wrong order.
Homeowners choose a colour or a louvre size from a brochure, fall in love with the image, and then try to make the measurement and configuration fit that choice. It should work the other way. Measure first, understand your reveal and clearance, decide how you will use the shutters daily, and then select the aesthetic details that work within those constraints. The result is a shutter that looks as good in five years as it does on installation day.
The second pattern I see repeatedly is underestimating the importance of mullion placement. It is a detail that costs nothing extra to get right and nothing less than a full replacement to correct after the fact. An offset mullion on a tall, narrow window is not a compromise. It is the technically correct choice, and it produces a result that looks genuinely bespoke rather than off-the-shelf.
My honest advice: treat the in-home consultation as the most valuable part of the process, not a formality before the real decision-making begins. The measurements and observations made during that visit are what separate a shutter that fits your home from one that merely covers your window.
— Ken
Transform your home with Shutterworld’s bespoke shutter service
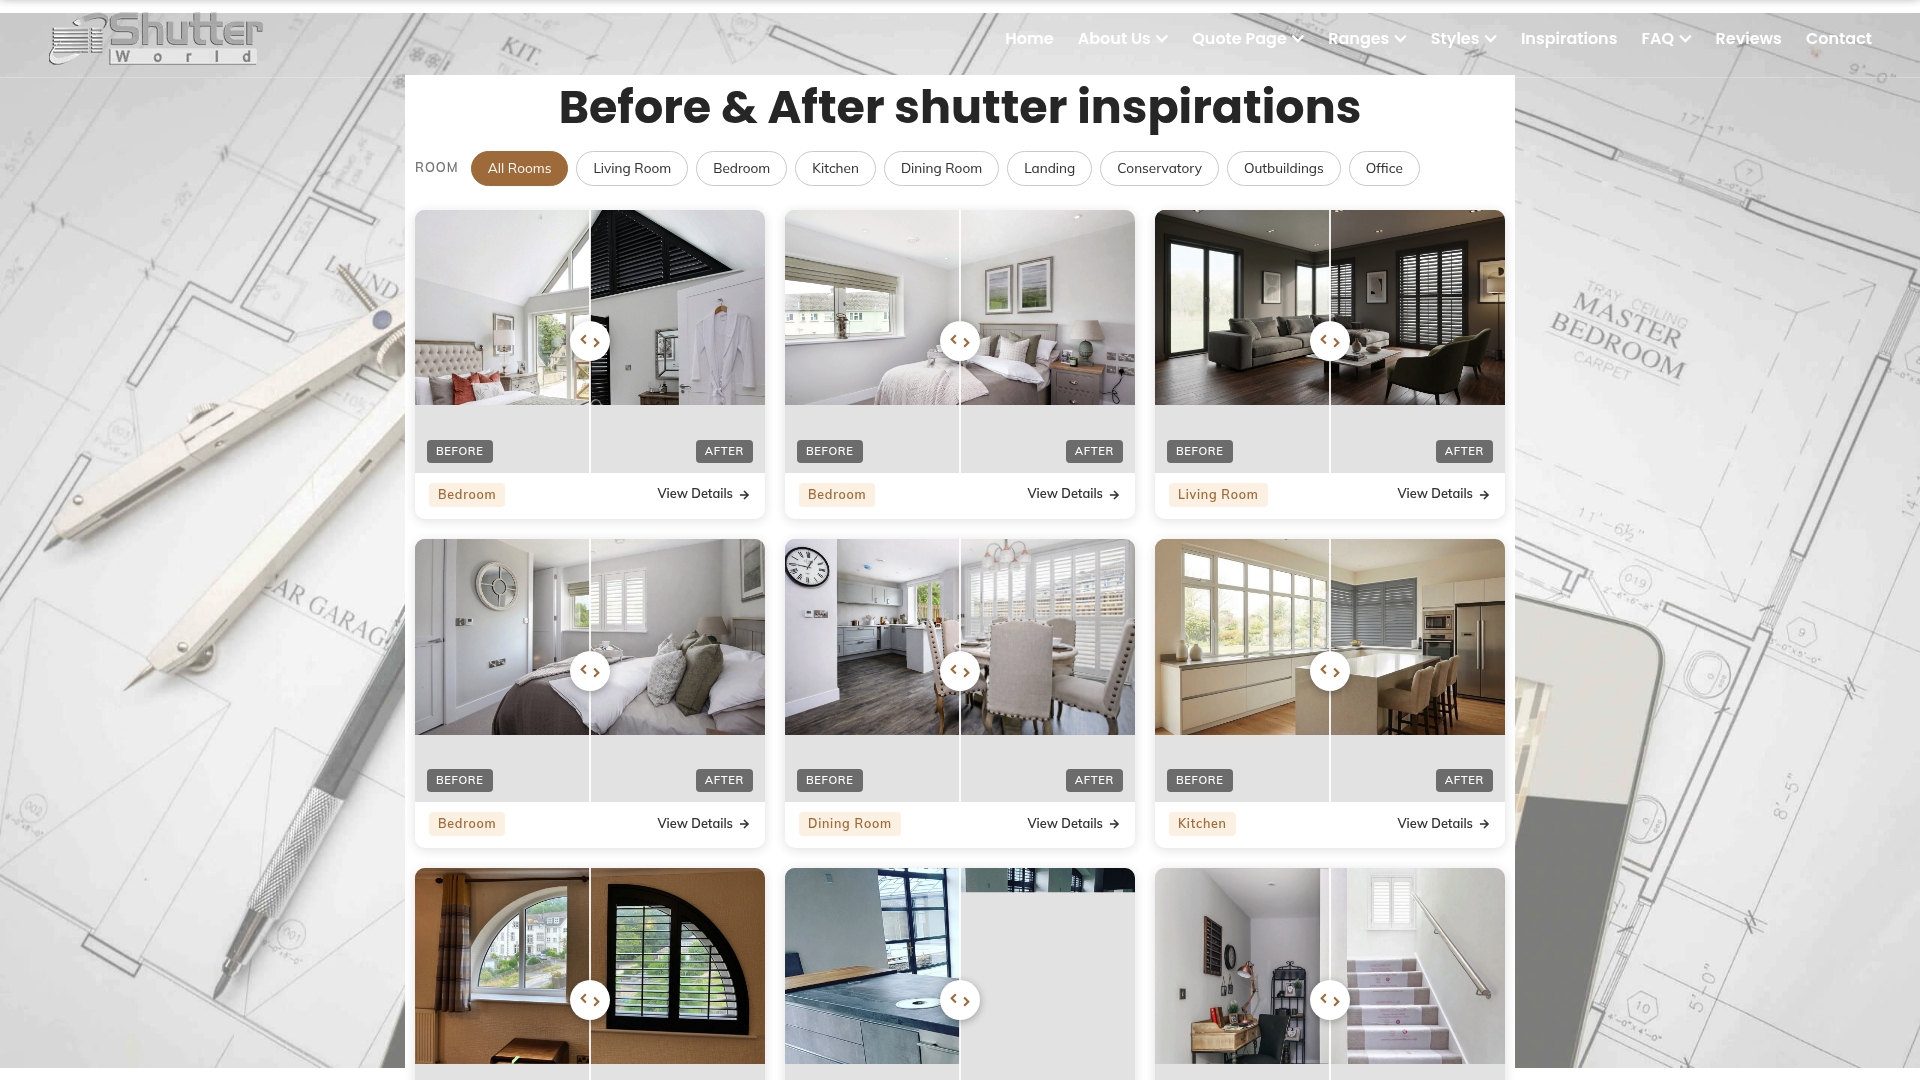
Shutterworld has spent over 25 years crafting made-to-measure interior shutters for UK homeowners, from straightforward rectangular windows to complex arched, bay, and angled configurations. Every project begins with a professional in-home survey that captures the precise measurements, reveal depths, and frame projections that guarantee a perfect fit. From the durable Seattle range to the premium Montana hardwood collection, every shutter is built to your exact specification and installed by experienced fitters. Explore Shutterworld’s full range of plantation shutters or discover what makes a truly bespoke internal shutter worth the investment. Book your free consultation today.
FAQ
What is shutter panel customisation?
Shutter panel customisation is the process of specifying a window shutter’s panel type, louvre size, configuration, material, and finish to match a home’s architecture and functional requirements. It goes beyond selecting a colour and includes structural decisions like mullion placement and panel opening style.
How long does it take to receive custom shutter panels?
Custom shutter production typically takes 4 to 6 weeks following a free in-home consultation for measurement and finish selection. Lead times can vary depending on the complexity of the window shape and the material specified.
What louvre size should I choose for my shutters?
Standard louvre sizes are 2.5″, 3.5″, 4.5″, and 5.5″. Larger louvres suit open-plan and contemporary spaces; smaller louvres are better suited to period properties and cottage-style interiors where a finer profile is more appropriate.
Do large shutter panels need additional structural support?
Yes. Panels taller than 130cm require mid-rails, and wider panels need T-posts to prevent sagging and louvre misalignment over time. These structural elements are specified during the design process and built into the panel at the fabrication stage.
How do I match shutters to my home’s interior style?
Raised panels suit traditional homes such as colonial and craftsman properties, while flat panels align with contemporary and transitional interiors. Shutterworld’s guide on matching shutters to your interior provides detailed guidance for aligning shutter design with your home’s character.