
Troubleshooting shutter issues: essential guide for UK homes

Troubleshooting shutter issues
TL;DR:
- Most interior shutter issues are fixable with DIY methods if properly diagnosed first.
- Proper preparation and the use of correct tools are essential for successful repairs.
- Regular maintenance and cautious troubleshooting help extend shutter lifespan and performance.
There is something uniquely frustrating about a set of interior shutters that refuse to cooperate. One moment they are the centrepiece of a beautifully finished room, and the next they are rattling at 3am, sticking mid-swing, or letting in unwanted light through gaps that simply should not be there. The good news is that the vast majority of shutter problems are entirely fixable without specialist intervention, provided you approach the task methodically. This guide walks you through everything you need to know, from accurately diagnosing the problem to completing a lasting repair and setting up a maintenance routine that protects your investment for years to come.
Table of Contents
- Identifying the root cause of shutter problems
- Essential tools and preparation before troubleshooting
- Step-by-step guide to fixing common shutter issues
- Verifying repairs and preventative maintenance
- What most guides miss about troubleshooting shutters
- How Shutter World can help you permanently solve shutter issues
- Frequently asked questions
Key Takeaways
| Point | Details |
|---|---|
| Diagnose before fixing | Identify the precise cause of the shutter problem for the most effective repair. |
| Prepare and use proper tools | Having the right equipment and following safety steps prevents damage and speeds up the repair. |
| Follow step-by-step fixes | Most common shutter faults can be corrected with simple, ordered troubleshooting steps. |
| Adopt regular maintenance | Routine cleaning and care dramatically reduces future malfunctions. |
| Know when to seek help | Shutter World offers expert solutions and bespoke repairs for persistent or complex issues. |
Identifying the root cause of shutter problems
Before you reach for a screwdriver, take a moment to properly assess what is actually going wrong. Rushing straight into repairs without a clear diagnosis is one of the most common mistakes homeowners make, and it often leads to wasted time or, worse, additional damage. A thorough inspection at the outset will save you considerable effort later.
The range of common shutter problems that UK homeowners encounter tends to fall into a handful of recognisable categories. Understanding which category your issue belongs to immediately narrows down the likely cause and the correct remedy.
Typical symptoms and their most likely causes:
- Stuck or stiff panels – Usually caused by loose or misaligned hinges, accumulated dust and debris in the frame channel, or minor swelling due to humidity.
- Louvres that won’t tilt or are frozen in one position – Often the result of a worn or overtightened tension screw, or a broken tilt rod linkage.
- Squeaking or grinding during operation – A reliable indicator that pivot points, hinges, or tilt rod connectors need lubrication or light cleaning.
- Rattling when the panels are closed – Typically caused by loose hardware, a slightly warped frame, or panels that have shifted out of true alignment.
- Light seeping in around edges or between louvres – Points to a gap caused by warping, incorrect installation, or panel misalignment over time.
Once you have matched your symptom to a likely cause, you can distinguish between a cosmetic problem (such as a surface scratch or minor discolouration) and a mechanical problem (such as a failing hinge or a broken tilt rod). Cosmetic issues are rarely urgent. Mechanical issues, if left unattended, tend to worsen and can eventually damage surrounding woodwork or the frame itself.
The importance of improving function early cannot be overstated. A small creak ignored for six months often becomes a stripped screw or a cracked louvre bracket by the time you finally investigate.
Pro Tip: Always work from the simplest possible explanation first. Check for loose screws and dust before assuming anything structural has failed. Nine times out of ten, the cause is far more straightforward than it initially appears.
Essential tools and preparation before troubleshooting
Once you have identified the likely cause, preparation is everything. Working without the correct tools or taking shortcuts during setup can turn a simple repair into a lengthy ordeal.
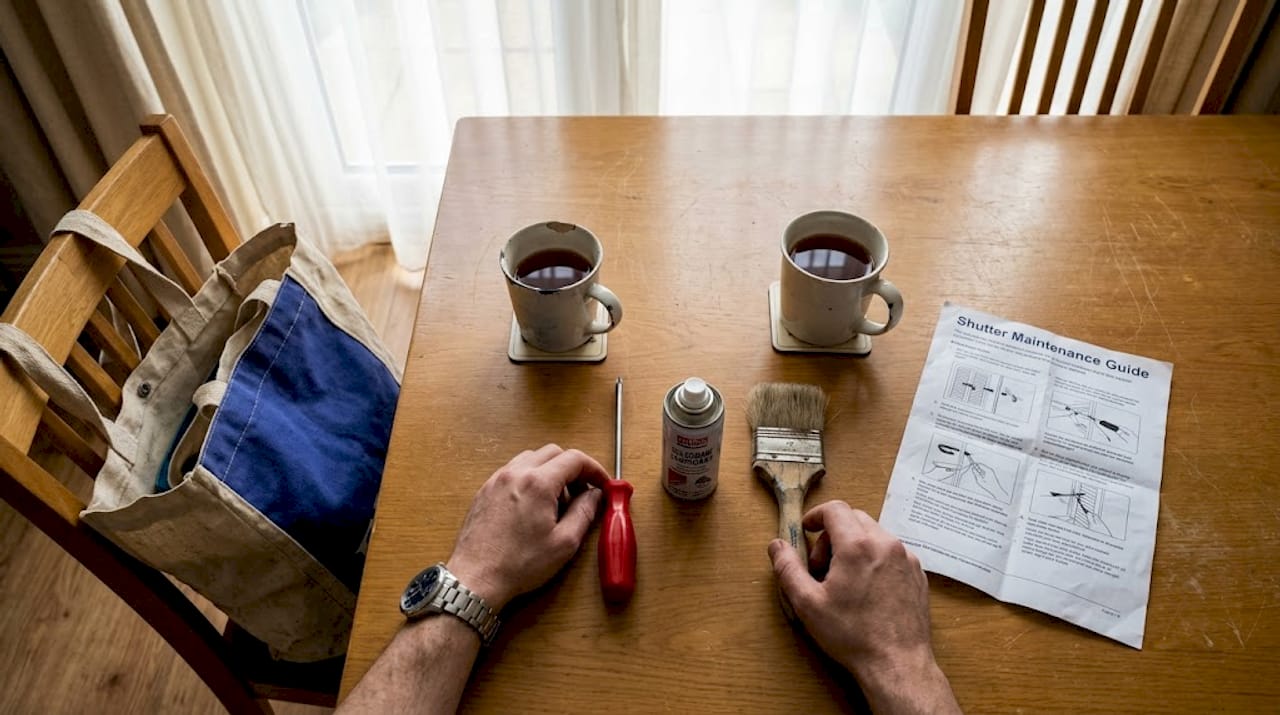
| Tool or material | Purpose |
|---|---|
| Cross-head and flat-head screwdrivers | Tightening or removing hinge and tension screws |
| Silicone-based lubricant spray | Lubricating pivot points, hinges, and tilt rods |
| Soft-bristle brush | Loosening and dislodging dust from louvres and channels |
| Vacuum cleaner with brush attachment | Removing dust from frames and panel tracks |
| Lint-free cloth | Wiping down surfaces after cleaning |
| Mild soapy water or specialist wood cleaner | Cleaning louvres and frames without causing damage |
| Step ladder | Safely reaching upper panels or top-mounted hardware |
| Smartphone or camera | Photographing hinge positions and screw placements before removal |
Following your maintenance checklist before starting any repair reduces the risk of missing something important. Here is a simple pre-repair preparation sequence:
- Clear the window sill and surrounding area of ornaments, plants, and soft furnishings.
- Open each shutter panel fully to expose hinges, pivot points, and frame channels.
- Test the motion of every panel and all louvres before touching anything, noting exactly where resistance or noise occurs.
- Inspect all visible screws and hardware for signs of looseness, corrosion, or damage.
- Look along the frame edge for any visible warping, splitting, or debris accumulation.
- If you plan to remove any screws or hardware, wear light work gloves and eye protection.
“Always make sure shutters are fully supported before removing any fixings or hardware. Panels can be heavier than they look, and an unsupported shutter can fall and cause injury or damage the frame beyond repair.”
The maintenance tips available from experienced shutter specialists emphasise that preparation is where most DIY repairs succeed or fail. Rushing past this stage is a risk not worth taking.
Pro Tip: Before removing a single screw, photograph every hinge, bracket, and tension point from multiple angles. These reference shots are invaluable when you come to reassemble everything, particularly on multi-panel or bi-fold configurations.
Step-by-step guide to fixing common shutter issues
You are now ready for the hands-on work. The following steps cover the four most frequently reported shutter faults and how to address each one confidently.
1. Tightening loose screws and hinges
Locate every visible screw on the hinges, frame fixings, and tilt rod connectors. Using the appropriate screwdriver, tighten each one in a clockwise direction, applying firm but controlled pressure. Do not force screws that resist, as this risks stripping the thread. If a screw spins without gripping, the hole may be worn. A small amount of wood filler or a slightly larger screw can often resolve this without replacing the entire hinge plate.
2. Lubricating stiff or squeaking hinges
Apply a thin, even coat of silicone-based lubricant directly to each hinge pin and pivot point. Move the panel back and forth several times to work the lubricant into the joint. Wipe away any excess with a lint-free cloth to prevent it from attracting dust. Repeat this on all tilt rod connectors where the louvres link together.
3. Realigning louvres that won’t move evenly
Louvres are connected by a vertical tilt rod. If one louvre is stuck while others move freely, the linkage clip at that connection point has likely come loose or broken. Carefully press the clip back into position on the louvre staple. If the clip is broken, a replacement part can usually be sourced from your original shutter supplier.
4. Cleaning and clearing accumulated debris
Use a soft-bristle brush to loosen dust from between louvres, then vacuum with the brush attachment. Wipe each louvre with a lightly dampened lint-free cloth. For the frame channel, run the brush along the full length before vacuuming. Avoid soaking wood shutters with water, as excess moisture can cause swelling and warping over time.
The shutter repair tips documented by specialists highlight that many homeowners successfully resolve their issues by following these steps alone.
Comparison: quick DIY fixes vs. when to call a professional
| Issue | DIY fix suitable? | Professional help advised? |
|---|---|---|
| Loose screws or hinges | Yes | No |
| Squeaking pivot points | Yes | No |
| Louvre linkage clip displaced | Yes (if clip intact) | If clip is broken |
| Dust and debris buildup | Yes | No |
| Minor panel misalignment | Yes | No |
| Warped frame or bowing panel | No | Yes |
| Snapped louvre or broken tilt rod | No | Yes |
| Damage to frame fixings in wall | No | Yes |
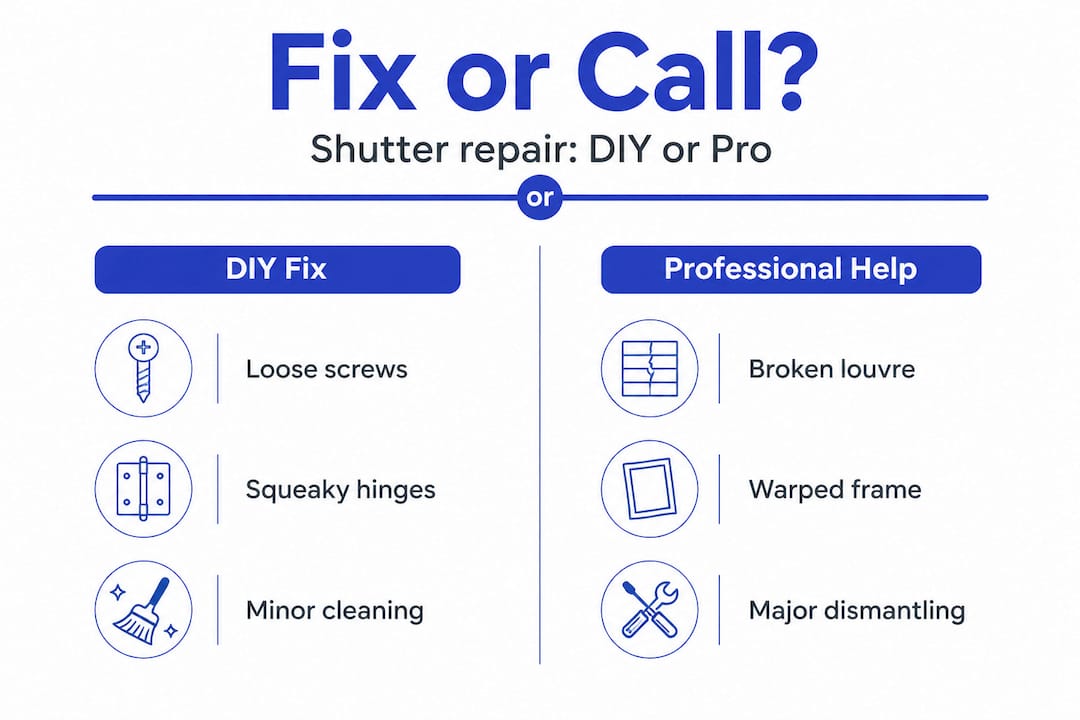
If your issue falls into the “professional help advised” column, guides on repairing shutters can help you understand the scope of what is involved before booking a specialist. Similarly, fitting tips are worth reviewing if you suspect the original installation may have been imprecise.
Once all repairs are complete, test every panel and every louvre before closing the room back up. A repair that cannot be verified is a repair that may need redoing very soon.
Pro Tip: Always use a silicone-based lubricant rather than household oils such as WD-40 or olive oil. General-purpose oils attract dust rapidly and can leave residue that gums up pivot points over time, turning a minor squeak into a genuine mechanical problem.
Verifying repairs and preventative maintenance
A completed repair is only truly successful once you have tested it thoroughly. Work through every panel and every louvre methodically, checking for smooth operation, full range of motion, and the absence of any residual noise.
Post-repair verification checklist:
- Open and close each panel fully, checking for resistance at any point in the swing.
- Tilt all louvres from fully open to fully closed, confirming even, controlled movement.
- Close all panels and inspect for any remaining light gaps around edges or between louvres.
- Listen carefully during operation for any squeaking, grinding, or rattling.
- Visually inspect all screws and hinges to confirm everything is seated correctly.
If something still feels off after completing the checklist, return to the diagnostic stage and recheck the specific area that is misbehaving. Occasionally a repair will reveal a secondary issue that was masked by the primary fault.
Looking ahead, the advice on shutter maintenance tips is clear: a consistent, light-touch maintenance routine is far more effective than periodic heavy intervention. Consider adopting these habits:
- Dust louvres and frames monthly using a soft cloth or microfibre duster, working from top to bottom to avoid redistributing settled dust.
- Avoid excess moisture in rooms with shutters, particularly in bathrooms or kitchens. Where condensation is a concern, ensure adequate ventilation to prevent wood shutters from absorbing humidity.
- Lubricate pivot points and hinges every six months, applying a small amount of silicone lubricant to keep movement smooth and prevent metal fatigue.
- Inspect all hardware twice a year, checking for loose screws and signs of wear in tilt rod connectors and hinge plates.
- Address issues immediately rather than allowing them to develop. A loose screw caught early takes thirty seconds to fix. Left for a year, it can cause hinge failure and panel drop.
📌 Regular cleaning and maintenance can extend the functional lifespan of quality interior shutters by several years, protecting the value of a significant home improvement investment.
When reviewing your shutters, it is also worth consulting buying tips if you are considering whether your current shutters are still fit for purpose or whether an upgrade might deliver better long-term results. Premium materials, such as the hardwood used in Shutter World’s Montana range, are inherently more resistant to warping and mechanical wear than lower-grade alternatives.
What most guides miss about troubleshooting shutters
We have been working with shutters for well over 25 years, and the single most consistent observation from that experience is this: most DIY repair failures are not caused by a lack of effort. They are caused by two very specific mistakes that rarely feature in standard troubleshooting advice.
The first is over-tightening screws. It feels counterintuitive, but applying too much torque to hinge screws or tension adjustment points is genuinely one of the most damaging things you can do. Overtightened screws strip the receiving hole, crack the surrounding timber, and create a repair problem far more complex than the original fault. Firm and secure is always the target. Cranked as tight as physically possible is never the right approach.
The second is using the wrong lubricant. The repair tips for unusual windows we provide to homeowners consistently flag this issue. General-purpose oils attract airborne dust and grit. Over weeks and months, this forms an abrasive paste inside pivot points and hinge pins, grinding away the very surfaces you were trying to protect.
Makeshift repairs, including packing gaps with tissue or taping louvres open, do not solve the underlying cause. They simply mask it until the next, larger failure. We have seen this pattern many times, and the downstream repair is always more involved than what the original fix would have required.
Our strongest advice, built from genuine field experience, is to keep a simple maintenance log for your shutters. Note the date, what you observed, and what action you took. After two or three entries, patterns emerge. You will notice, for instance, that a particular panel consistently develops a squeak after humid weather, which tells you something specific about that installation point. That knowledge allows you to intervene early, every time.
Finally, know your limits honestly. DIY troubleshooting is ideal for loose hardware, lubrication, cleaning, and minor realignment. It is not suitable for structurally warped frames, broken louvres, or issues that require the shutter to be removed from its frame entirely. Recognising that distinction early is not a concession. It is good judgement.
How Shutter World can help you permanently solve shutter issues
If your shutters continue to cause problems despite careful troubleshooting, or if you simply want the assurance of a flawlessly finished result, professional support makes all the difference.

At Shutter World, we offer far more than beautifully crafted shutters. Our team provides expert guidance at every stage, from initial diagnosis through to professional plantation shutter installation carried out by experienced fitters who understand the nuances of bespoke joinery. If your current shutters are beyond DIY repair, our bespoke shutter solutions are designed to deliver lasting performance, precision fit, and the kind of refined finish that genuinely transforms a room. For inspiration on what is possible across a wide range of window styles, browse our window shutters inspirations gallery and see the results our craftsmanship delivers in real UK homes. Book your free in-home survey today and let us take care of the rest.
Frequently asked questions
What are the most common reasons interior shutters stick or jam?
The most common causes are dust buildup in frame channels, loose or misaligned hinge hardware, and minor panel swelling caused by humidity, as outlined in our overview of typical shutter issues. Improper installation at the outset can also contribute to persistent sticking.
How often should interior shutters be maintained to prevent issues?
Shutters should be cleaned and inspected at least every six months to prevent both mechanical and cosmetic problems from developing, as advised in our expert maintenance guidance. Monthly dusting between formal checks significantly reduces wear on moving parts.
When should I call a professional rather than attempt DIY shutter repairs?
If your frame is warped, louvres are broken, or the repair requires the shutter to be dismantled from its fixings, it is time to seek expert assistance, as detailed in our guide to repairing shutters. Attempting complex structural repairs without experience risks making the problem considerably worse.
Can regular household oil be used to lubricate shutter hinges?
No. Household oils attract dust and debris, which accumulate into an abrasive residue inside pivot points and hinge pins over time. Always use a silicone-based lubricant, applied sparingly, for smooth and lasting results.
Recommended
- How to Install Shutters Safely in UK Home
- 7 Essential Shutter Buying Tips for Unique UK Homes | Shutter World
- Enhance Your Home’s Atmosphere: Shutter Functionality Tips | Shutter World
- How to Assess Shutter Quality for UK Homes and Interiors | Shutter World
- Air conditioning troubleshooting tips for Devon and Cornwall